
Initial Setup
Welcome to our guide on setting up the Chainway CP30 RFID Printer. This article will walk you through the setup process, including connecting your printer, loading the ribbon and tags, and initial configuration. If you prefer a visual guide, feel free to follow the course documentation.
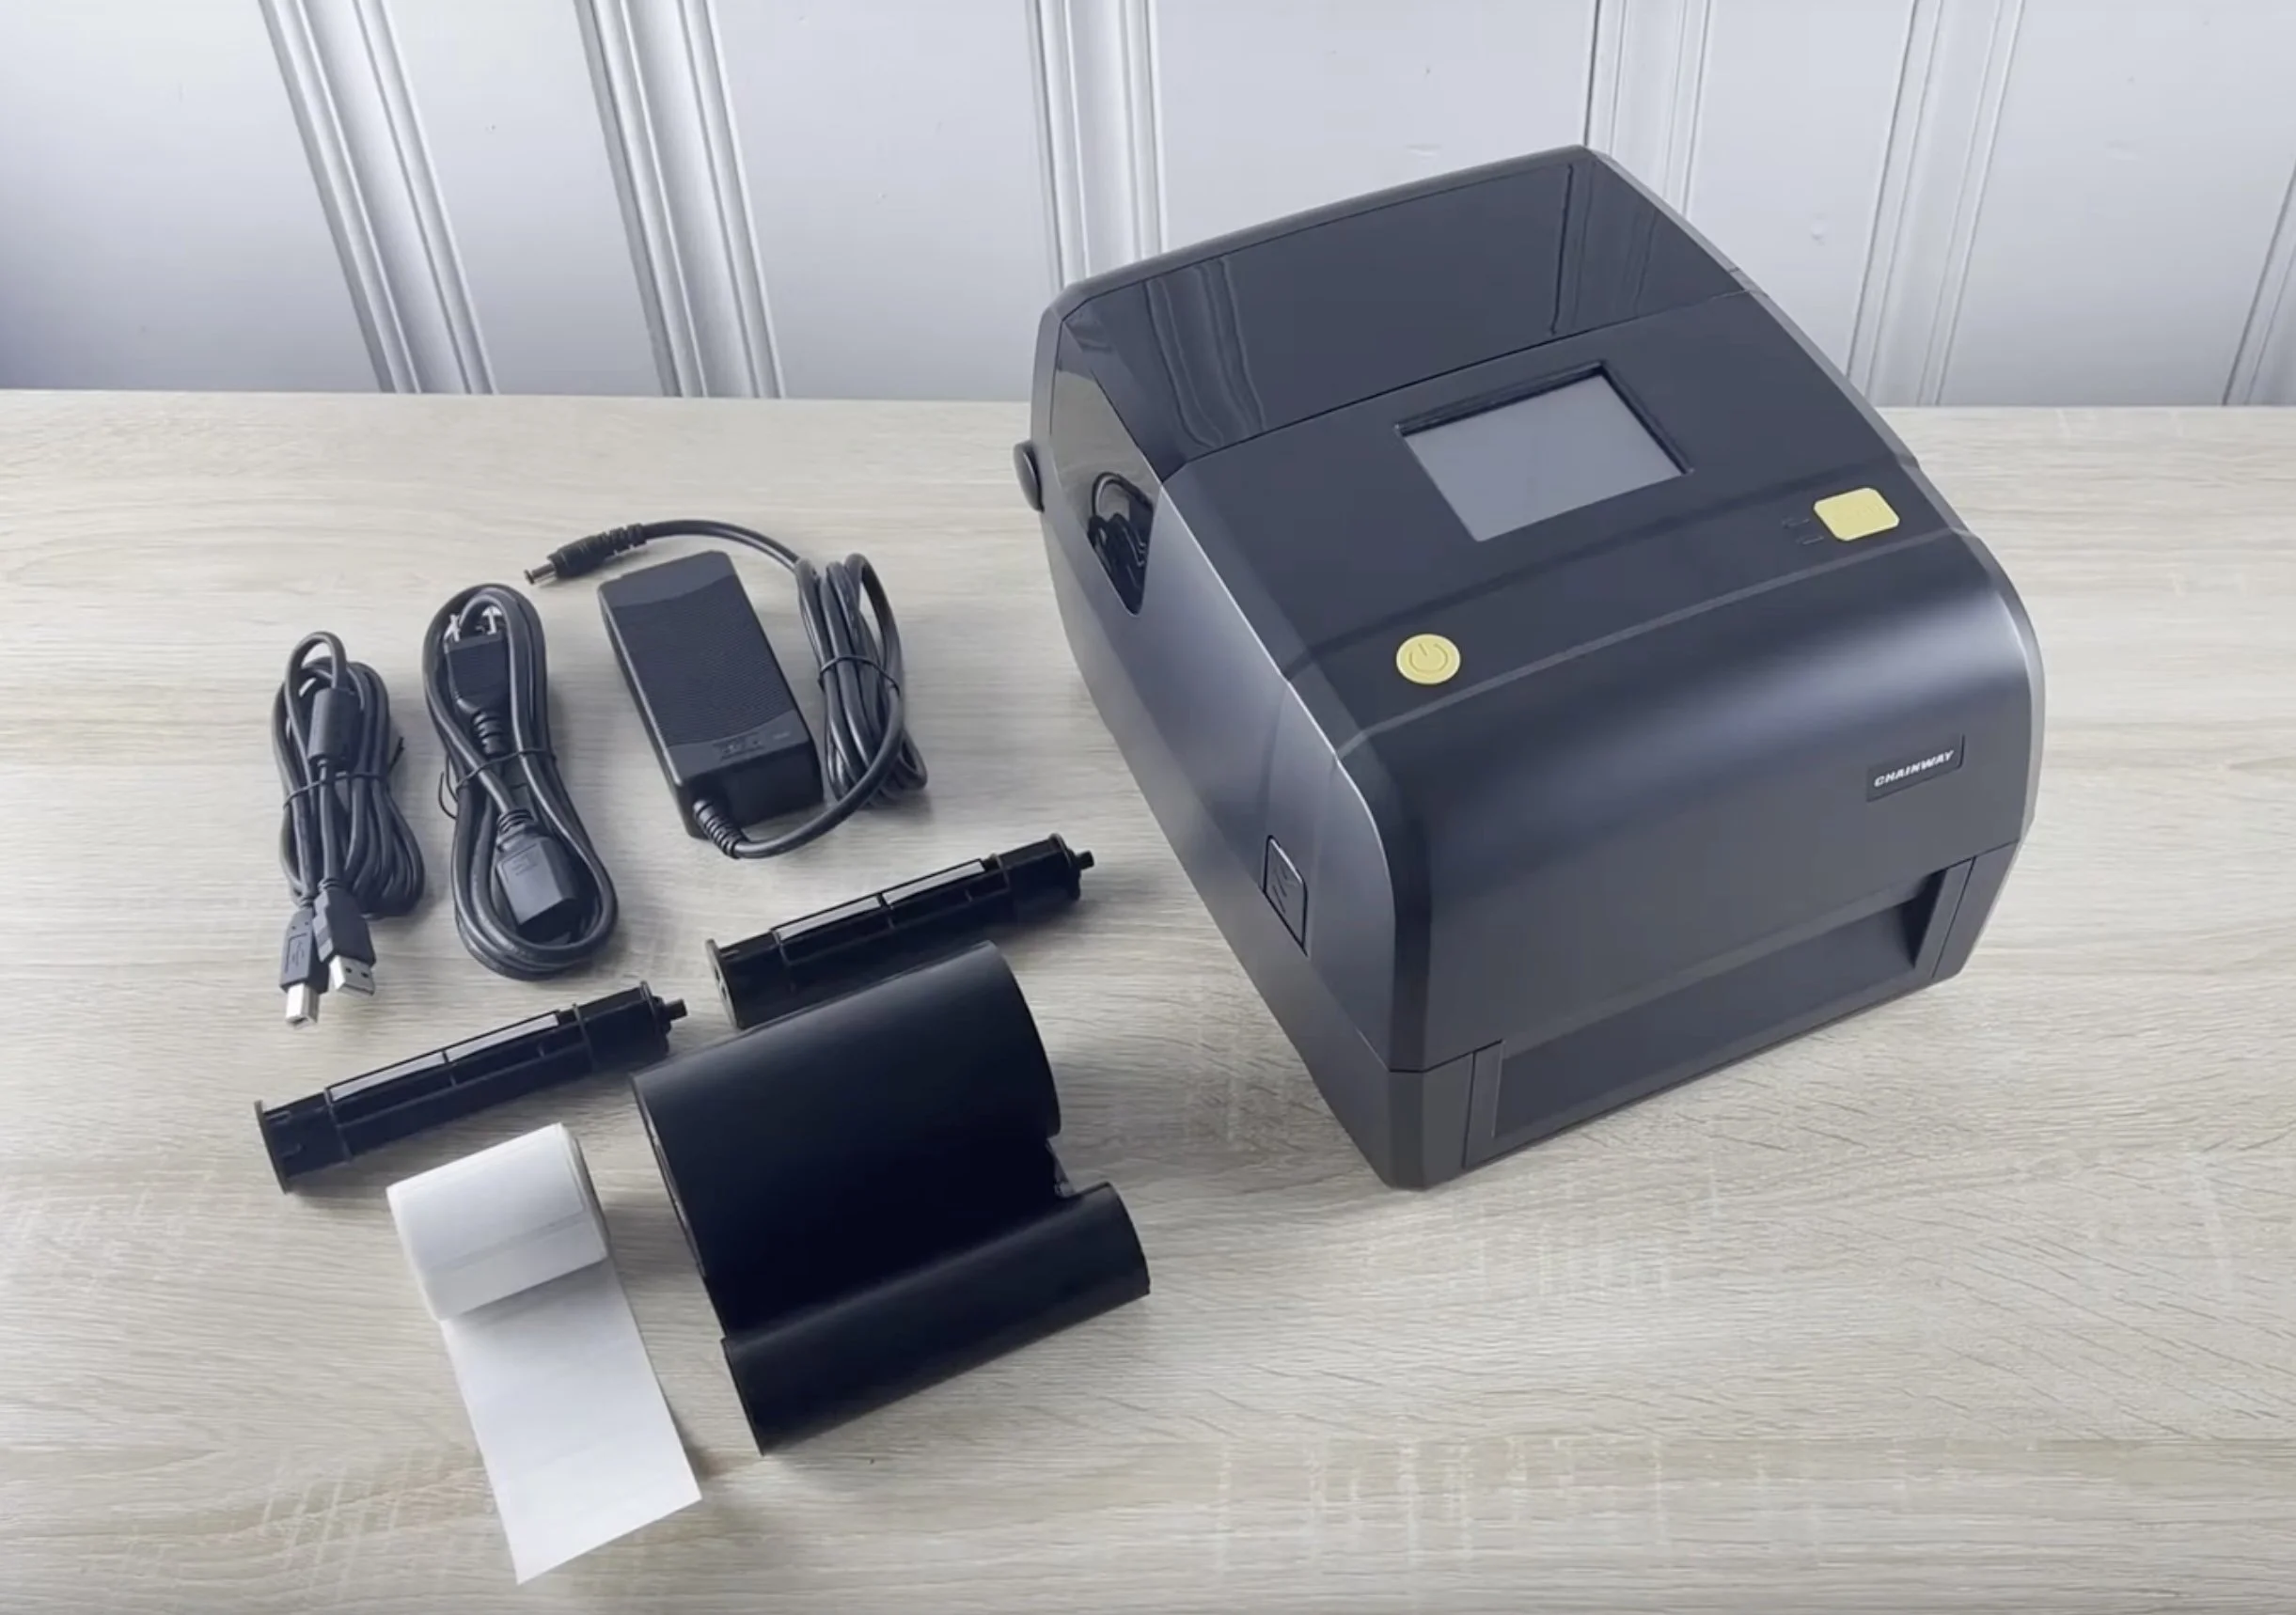
Unpacking Your Bundle
Understanding the Printer Components
Inside the Printer
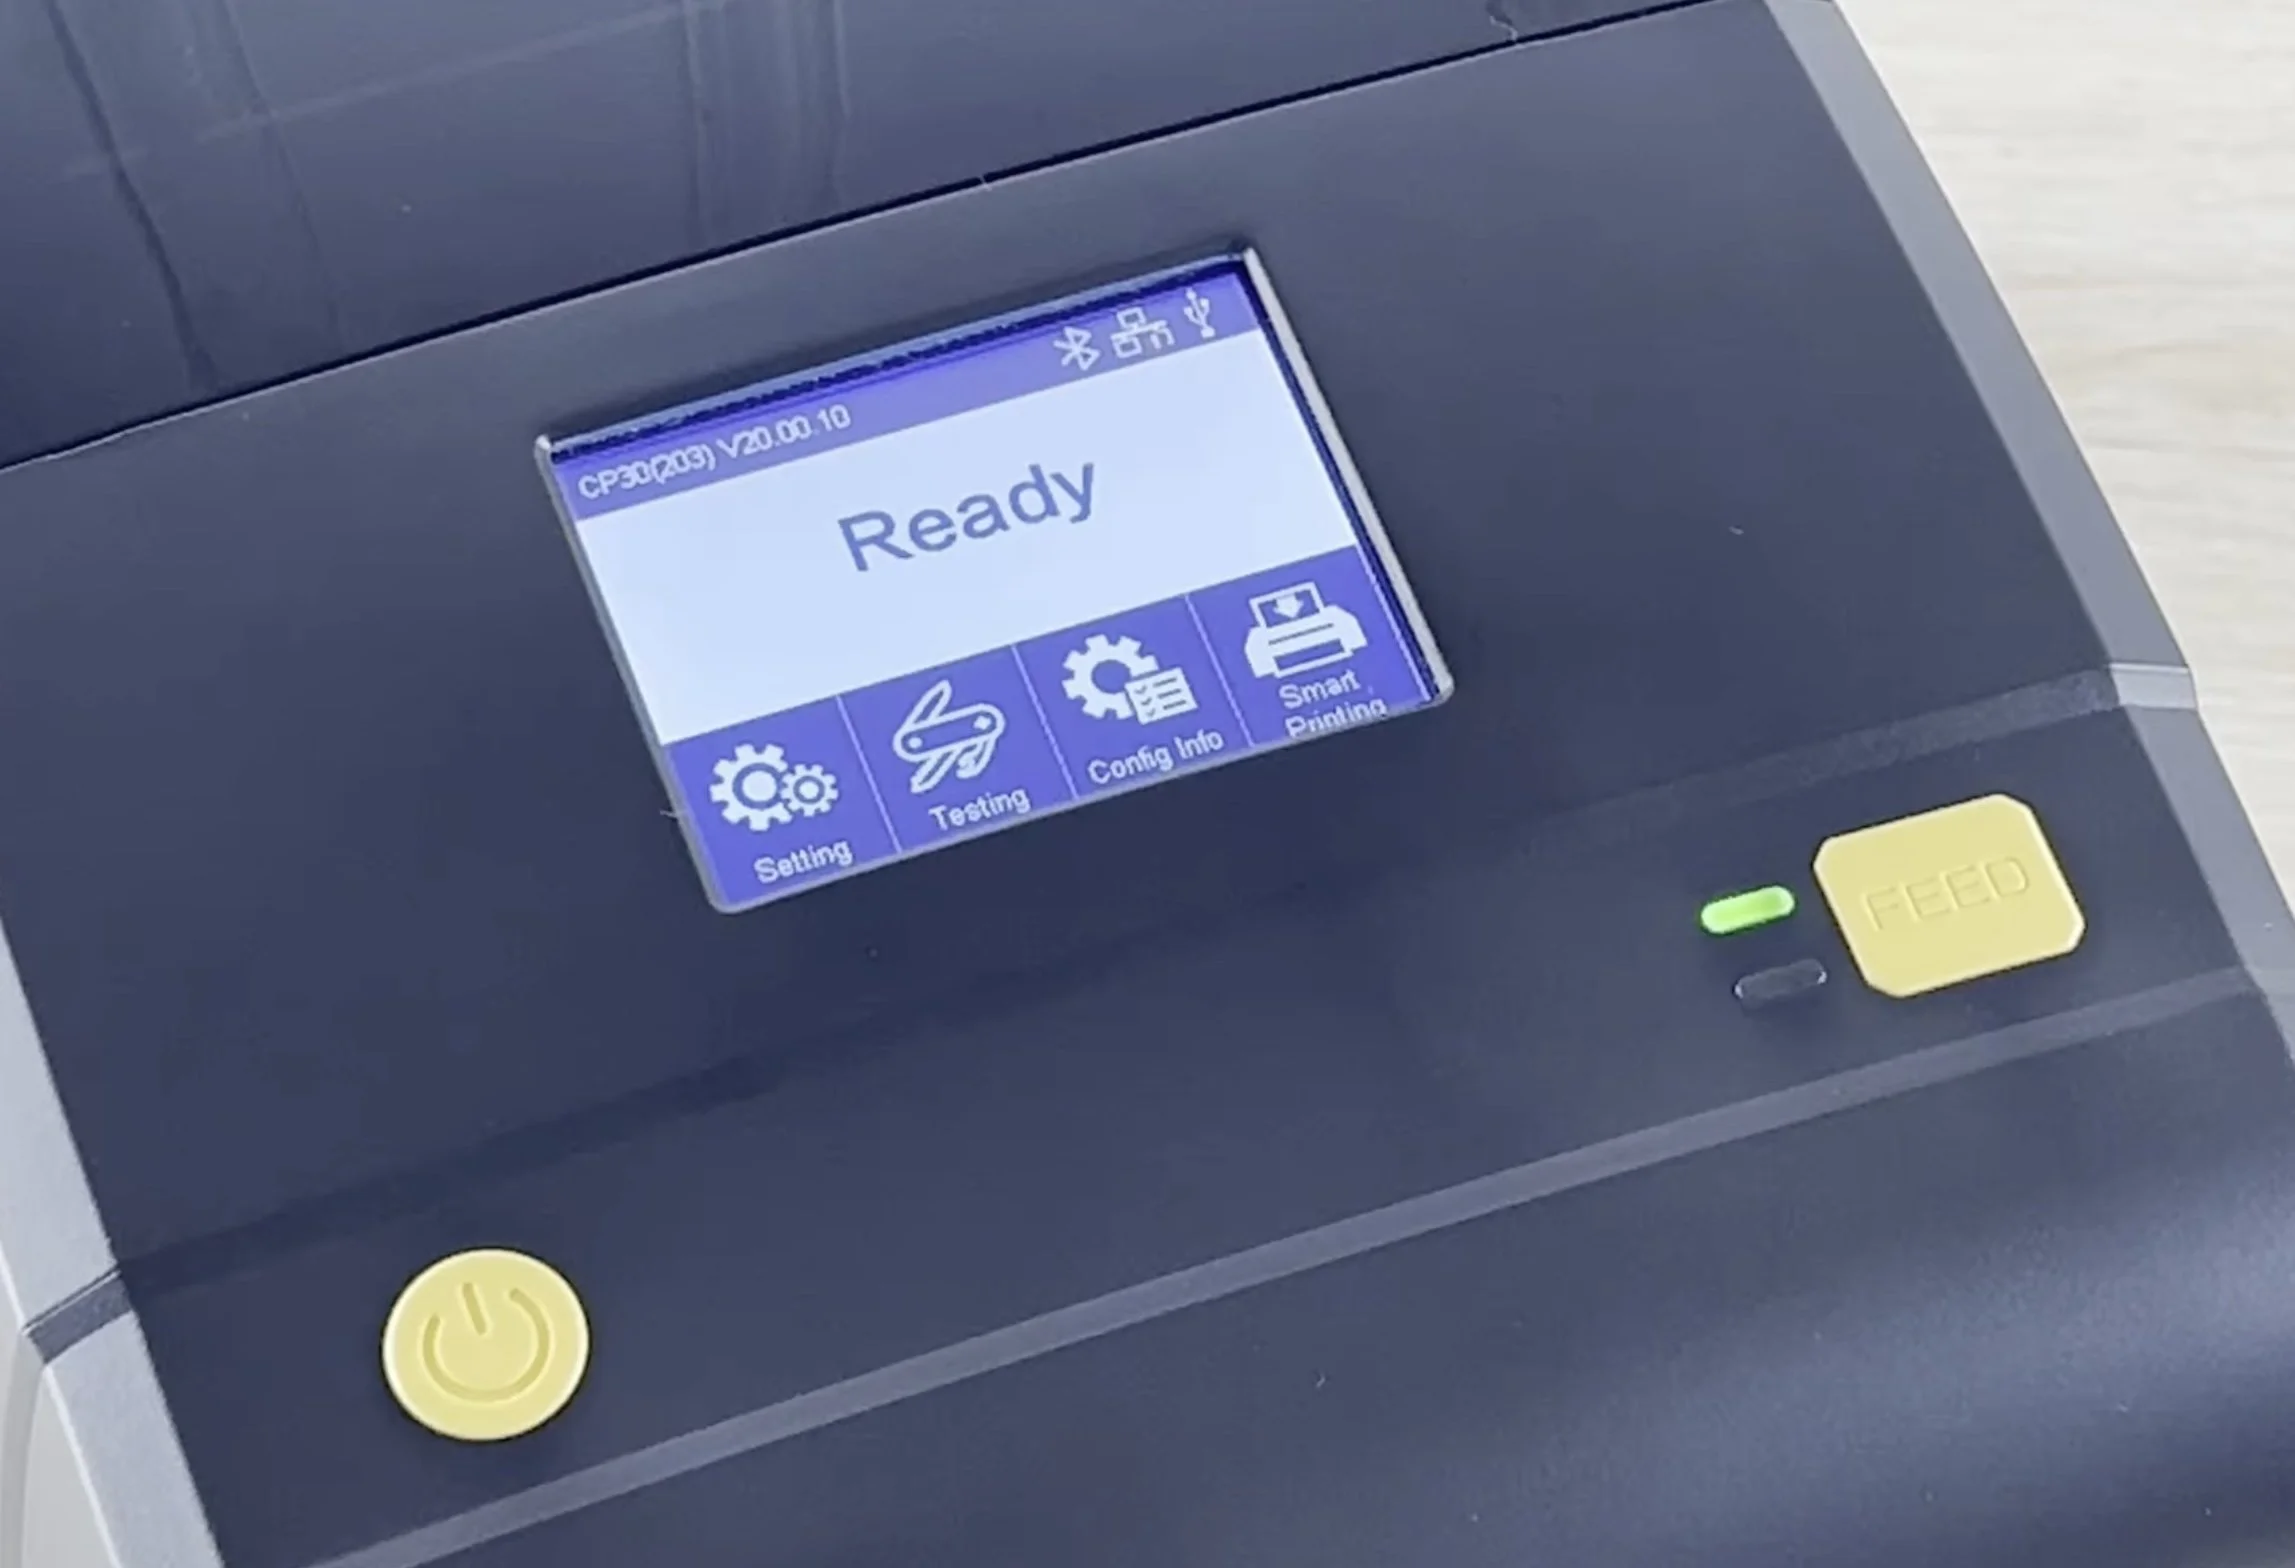
Front of the Printer:
Power button
Printer feed button
3.5-inch LCD touch display
Two LED indicator lights
Release buttons on each side for opening the clam-shell
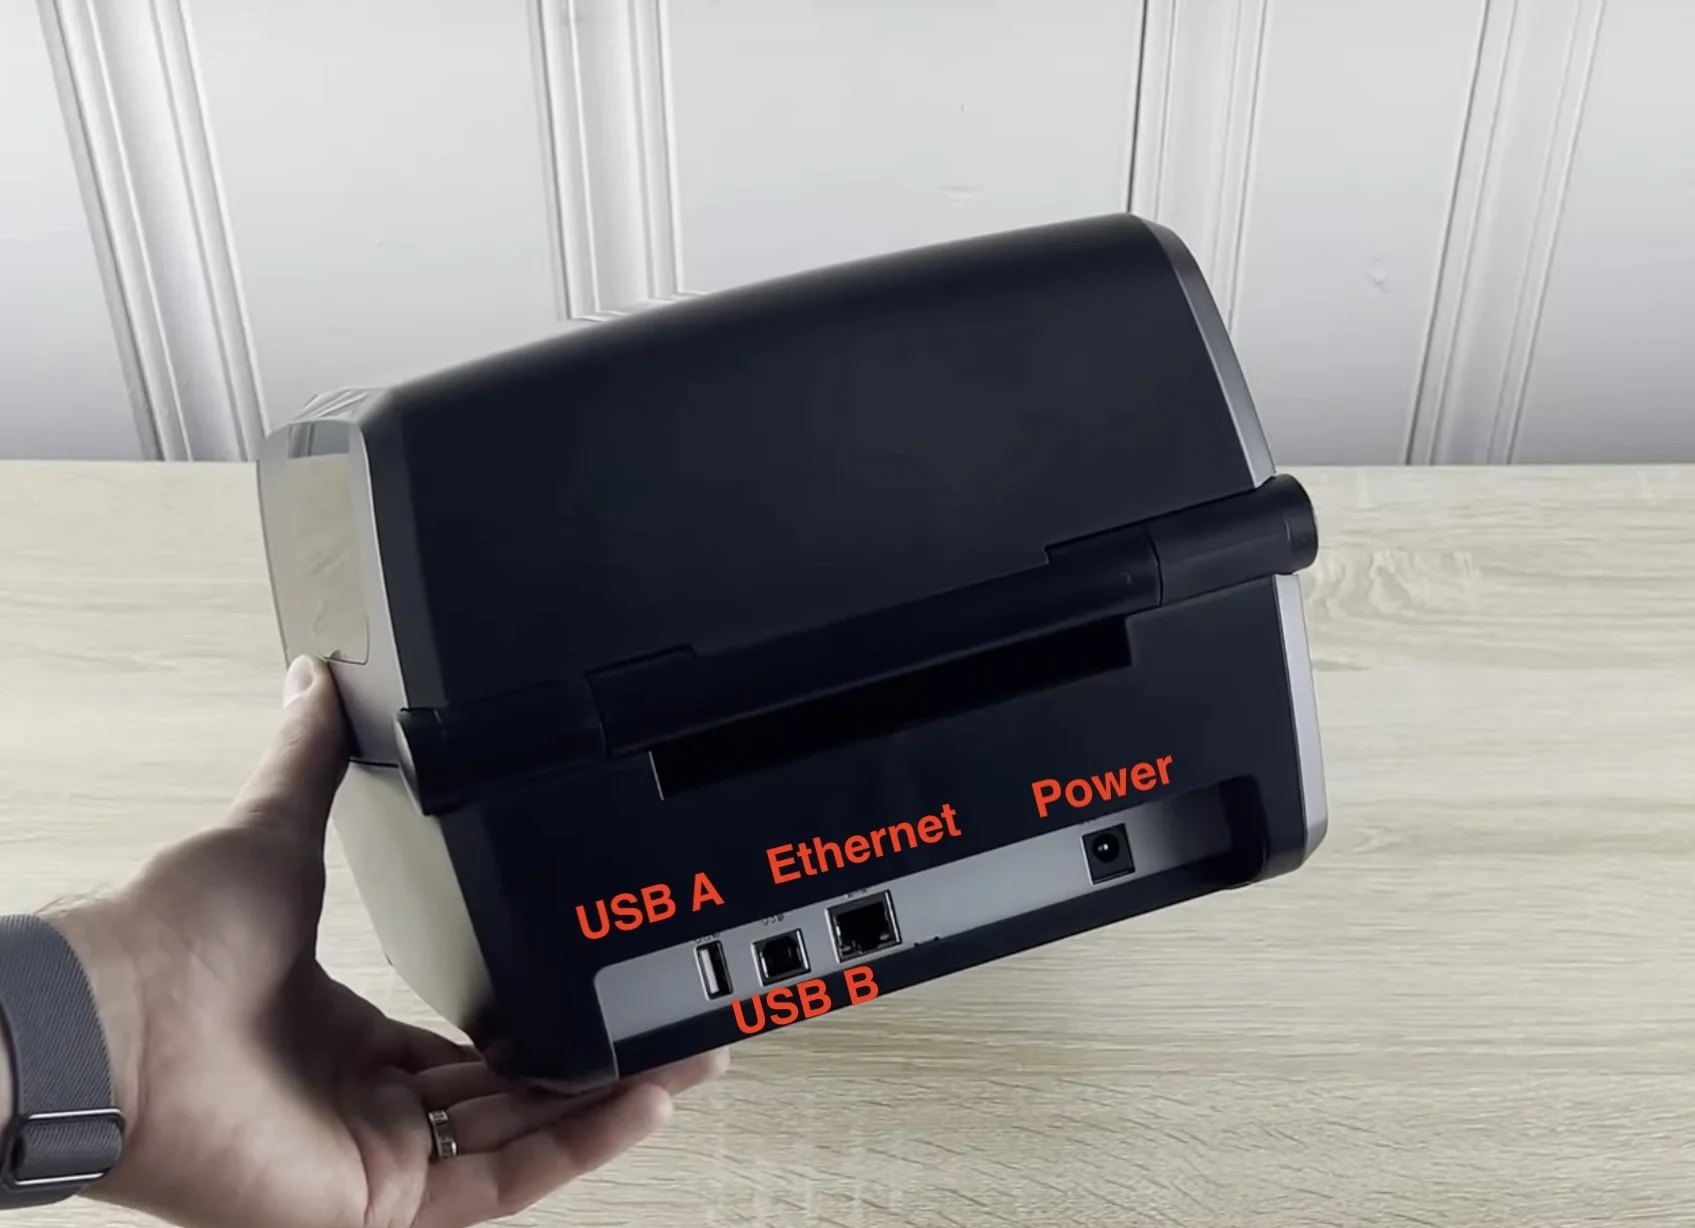
Back of the Printer:
External spool feed port
USB A header
USB B header
RJ45 Ethernet network port
Power jack/connector
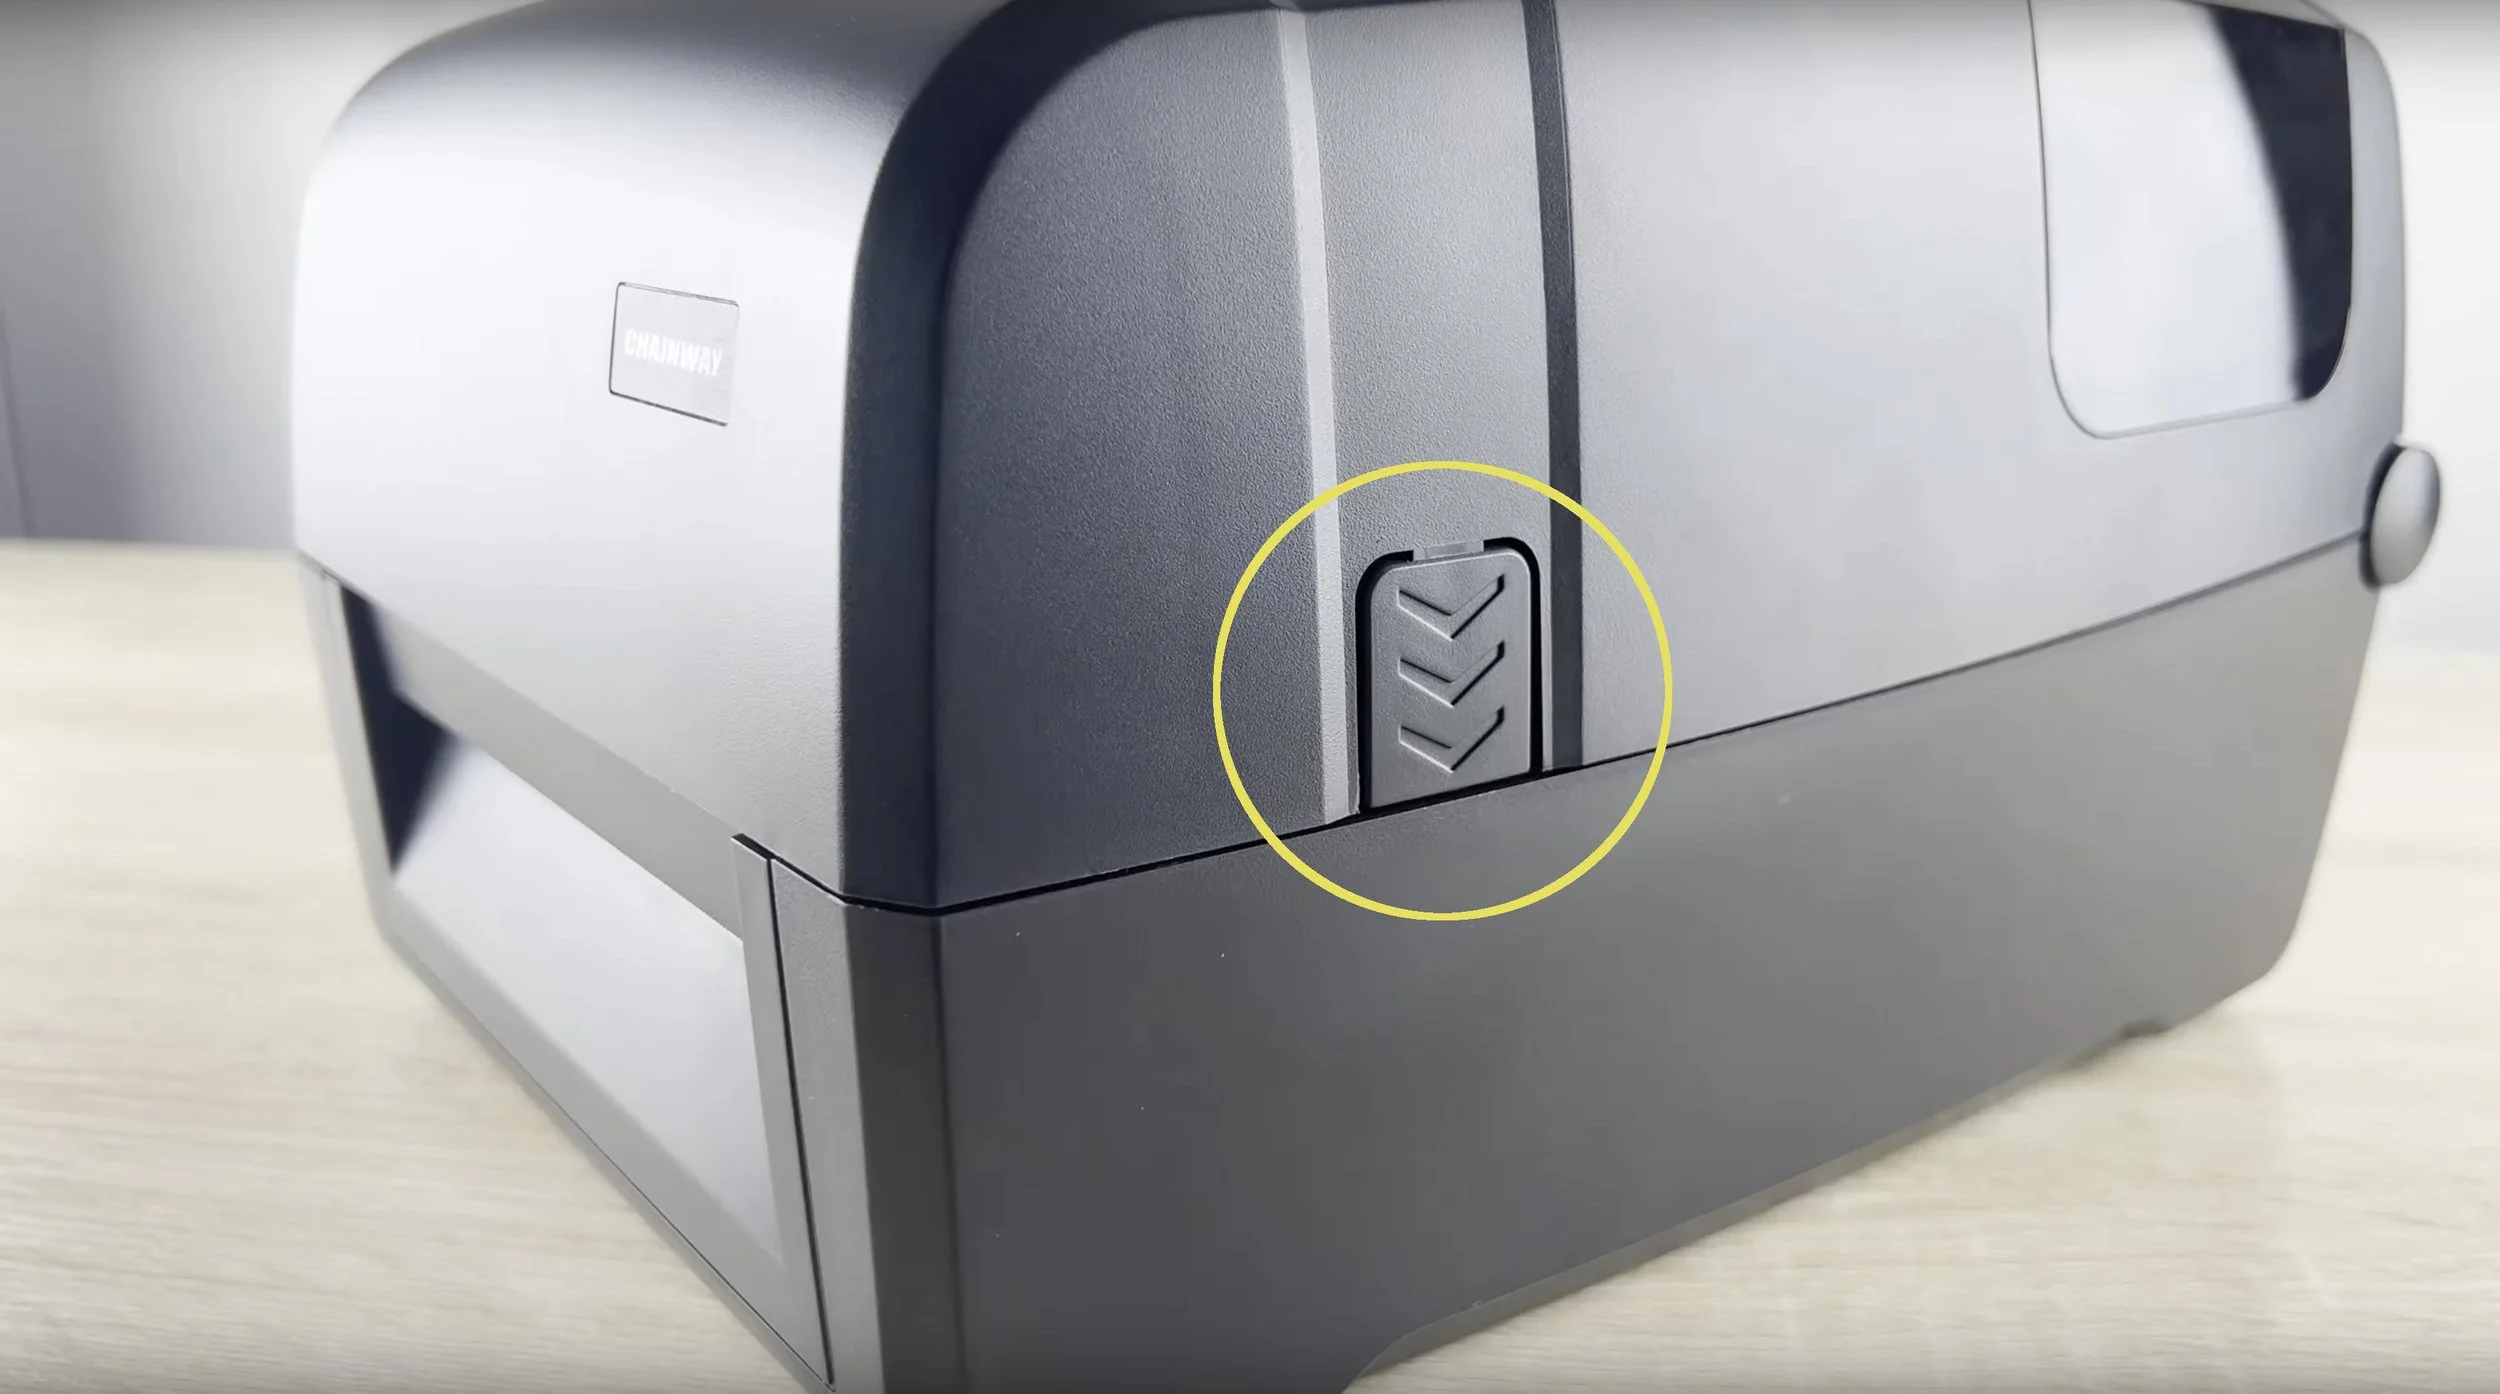
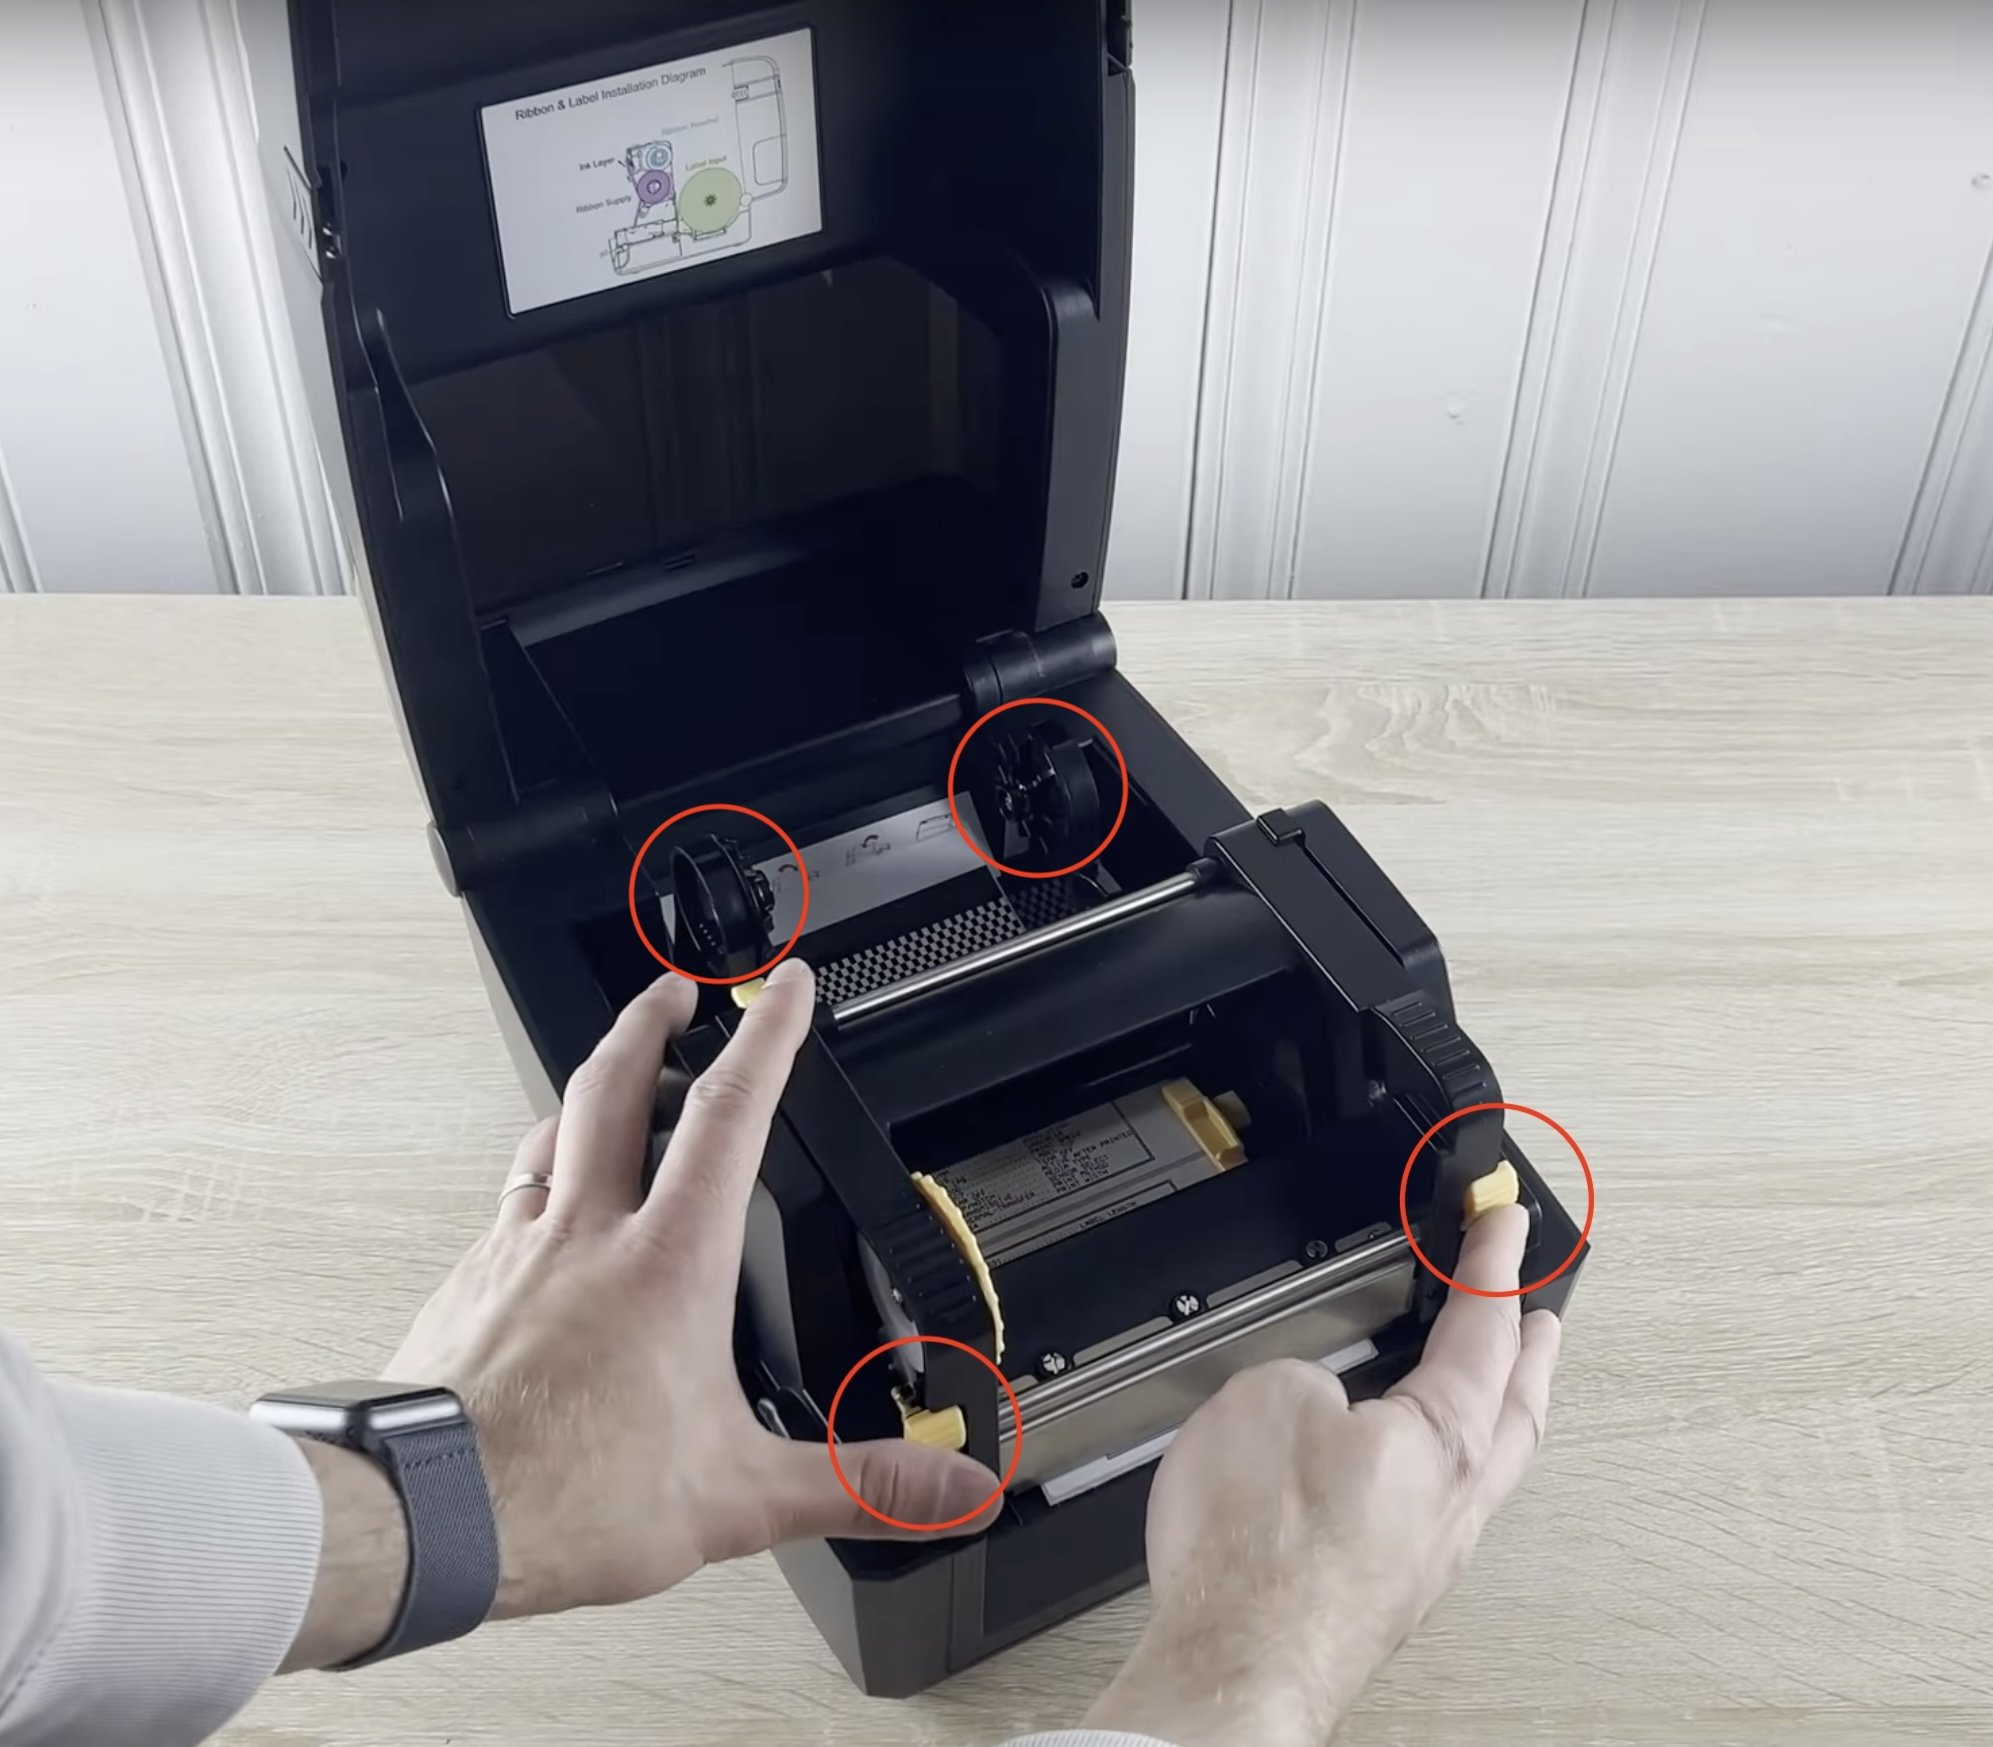
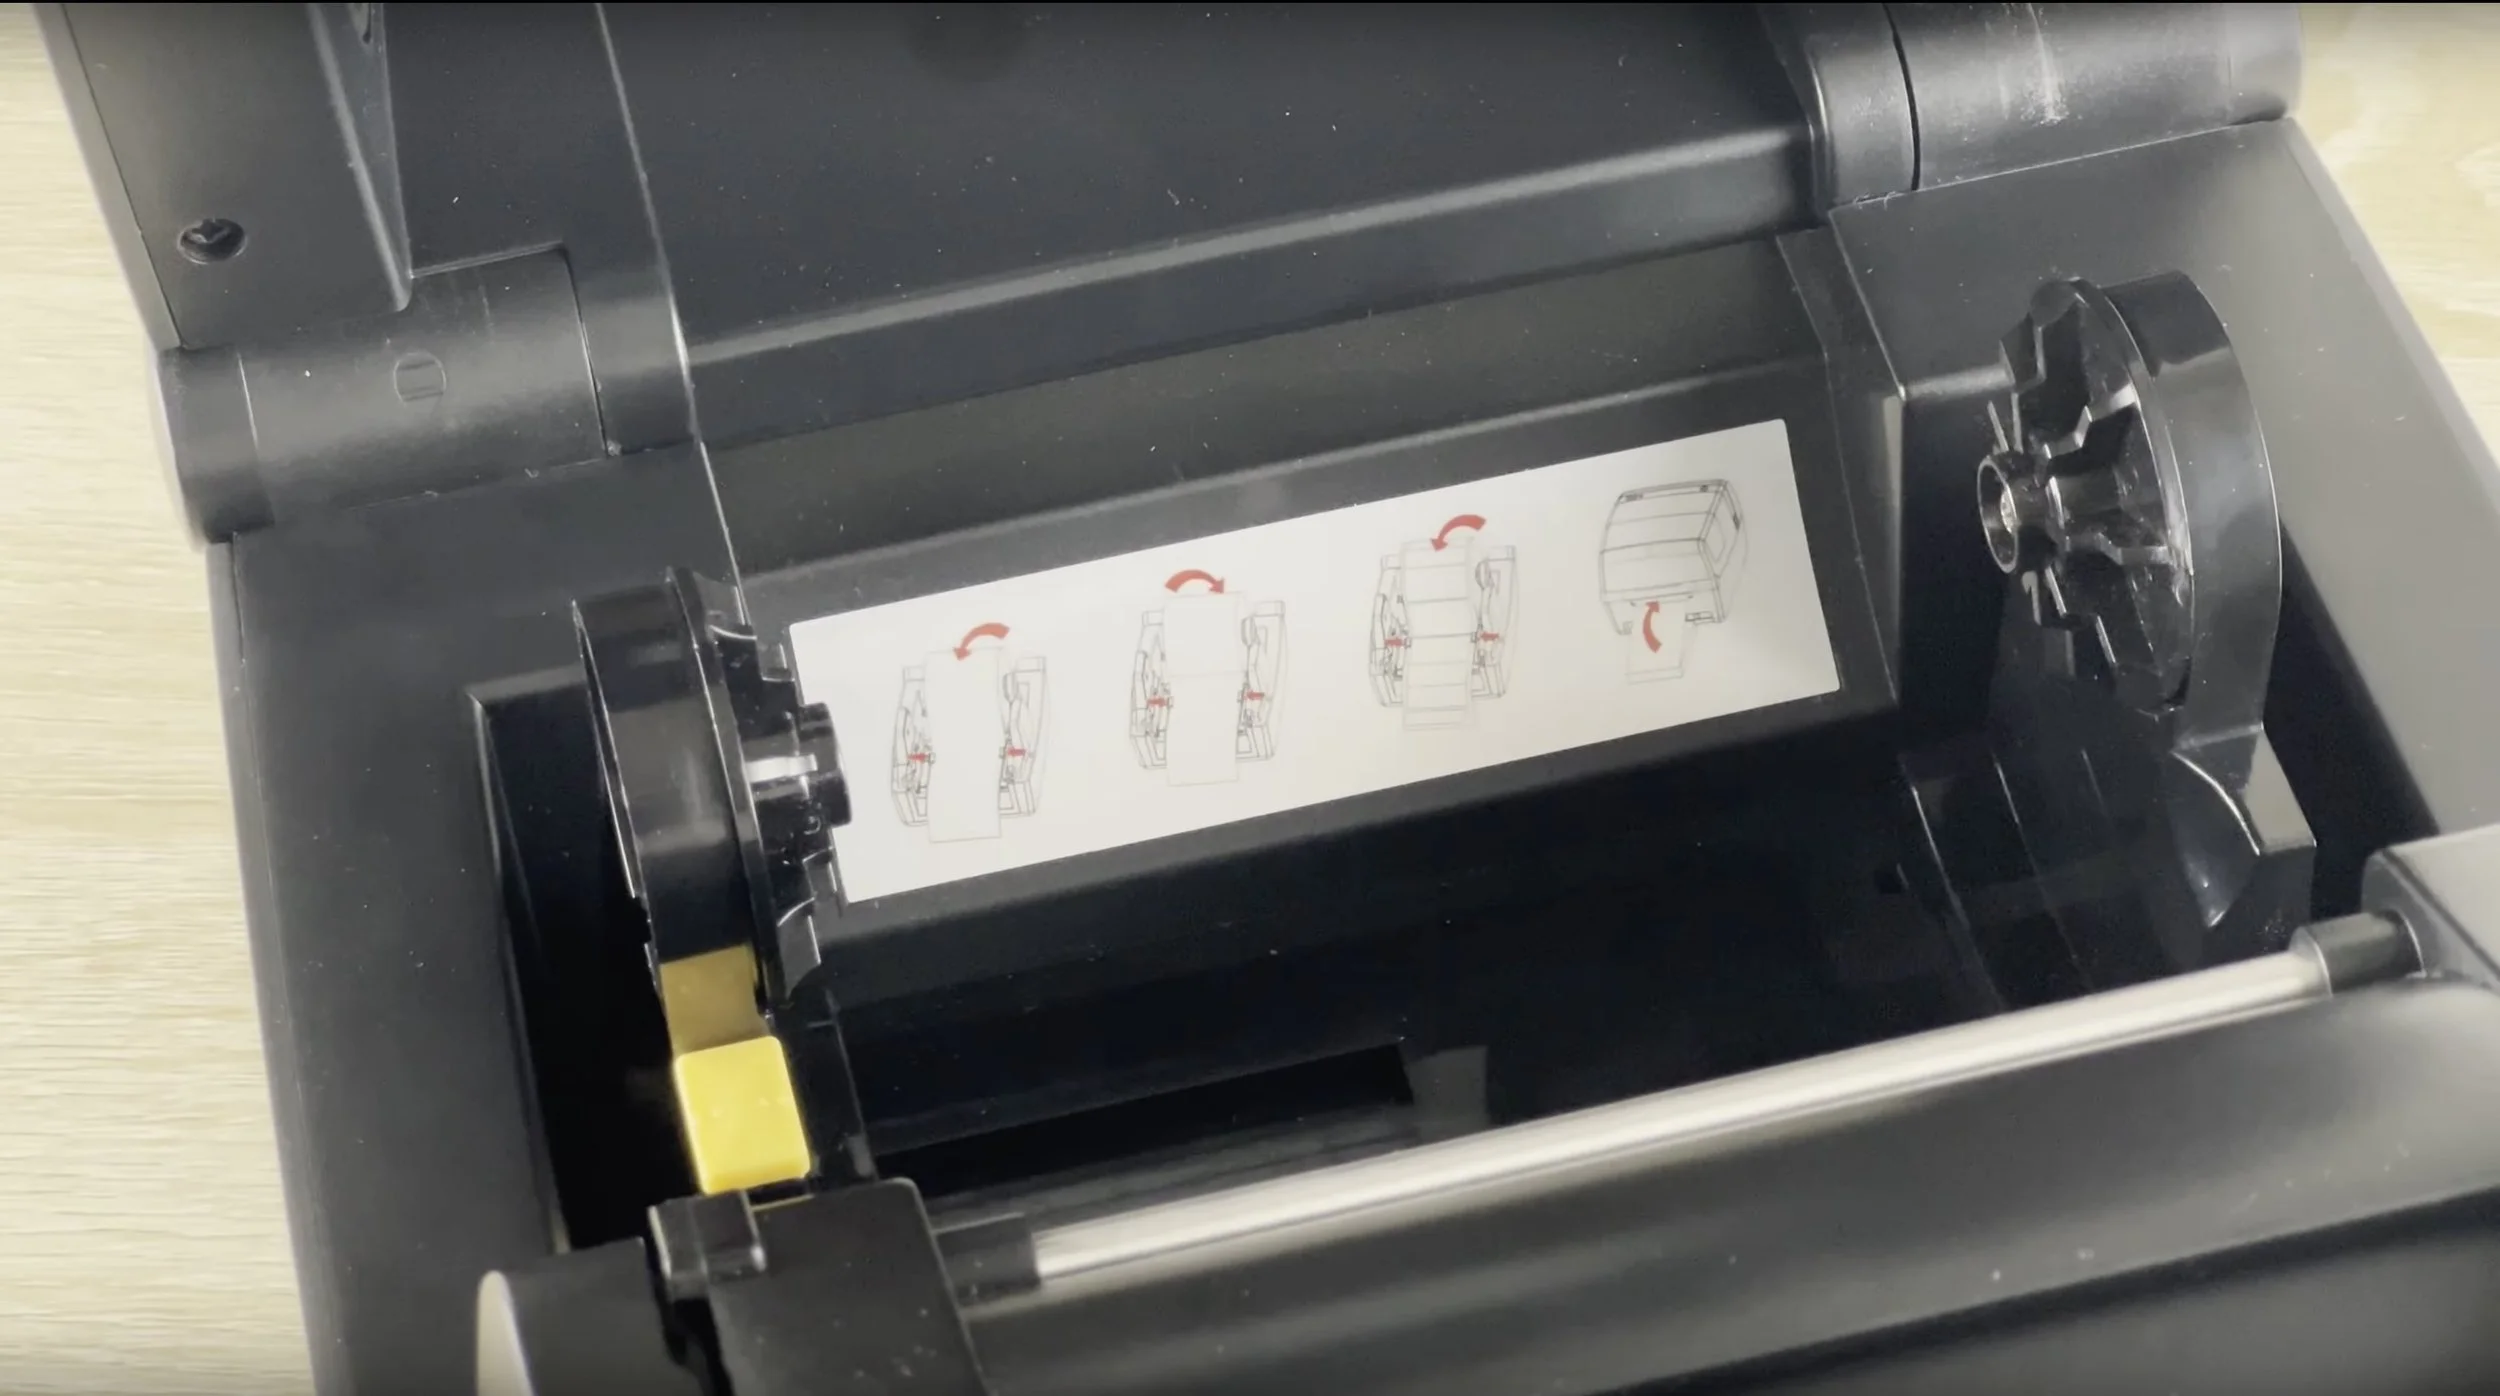
Opening the Clam-shell:
Press the release buttons on each side to open the clam-shell.
Refer to the handy guides inside the printer for assistance.
Adjustable Tag Holder:
Located inside at the back of the printer.
Ribbon Carrier:
Located inside towards the front.
Open by pushing the two yellow tabs.
Loading the Ribbon
Installing the Tags
Powering On and Initial Setup
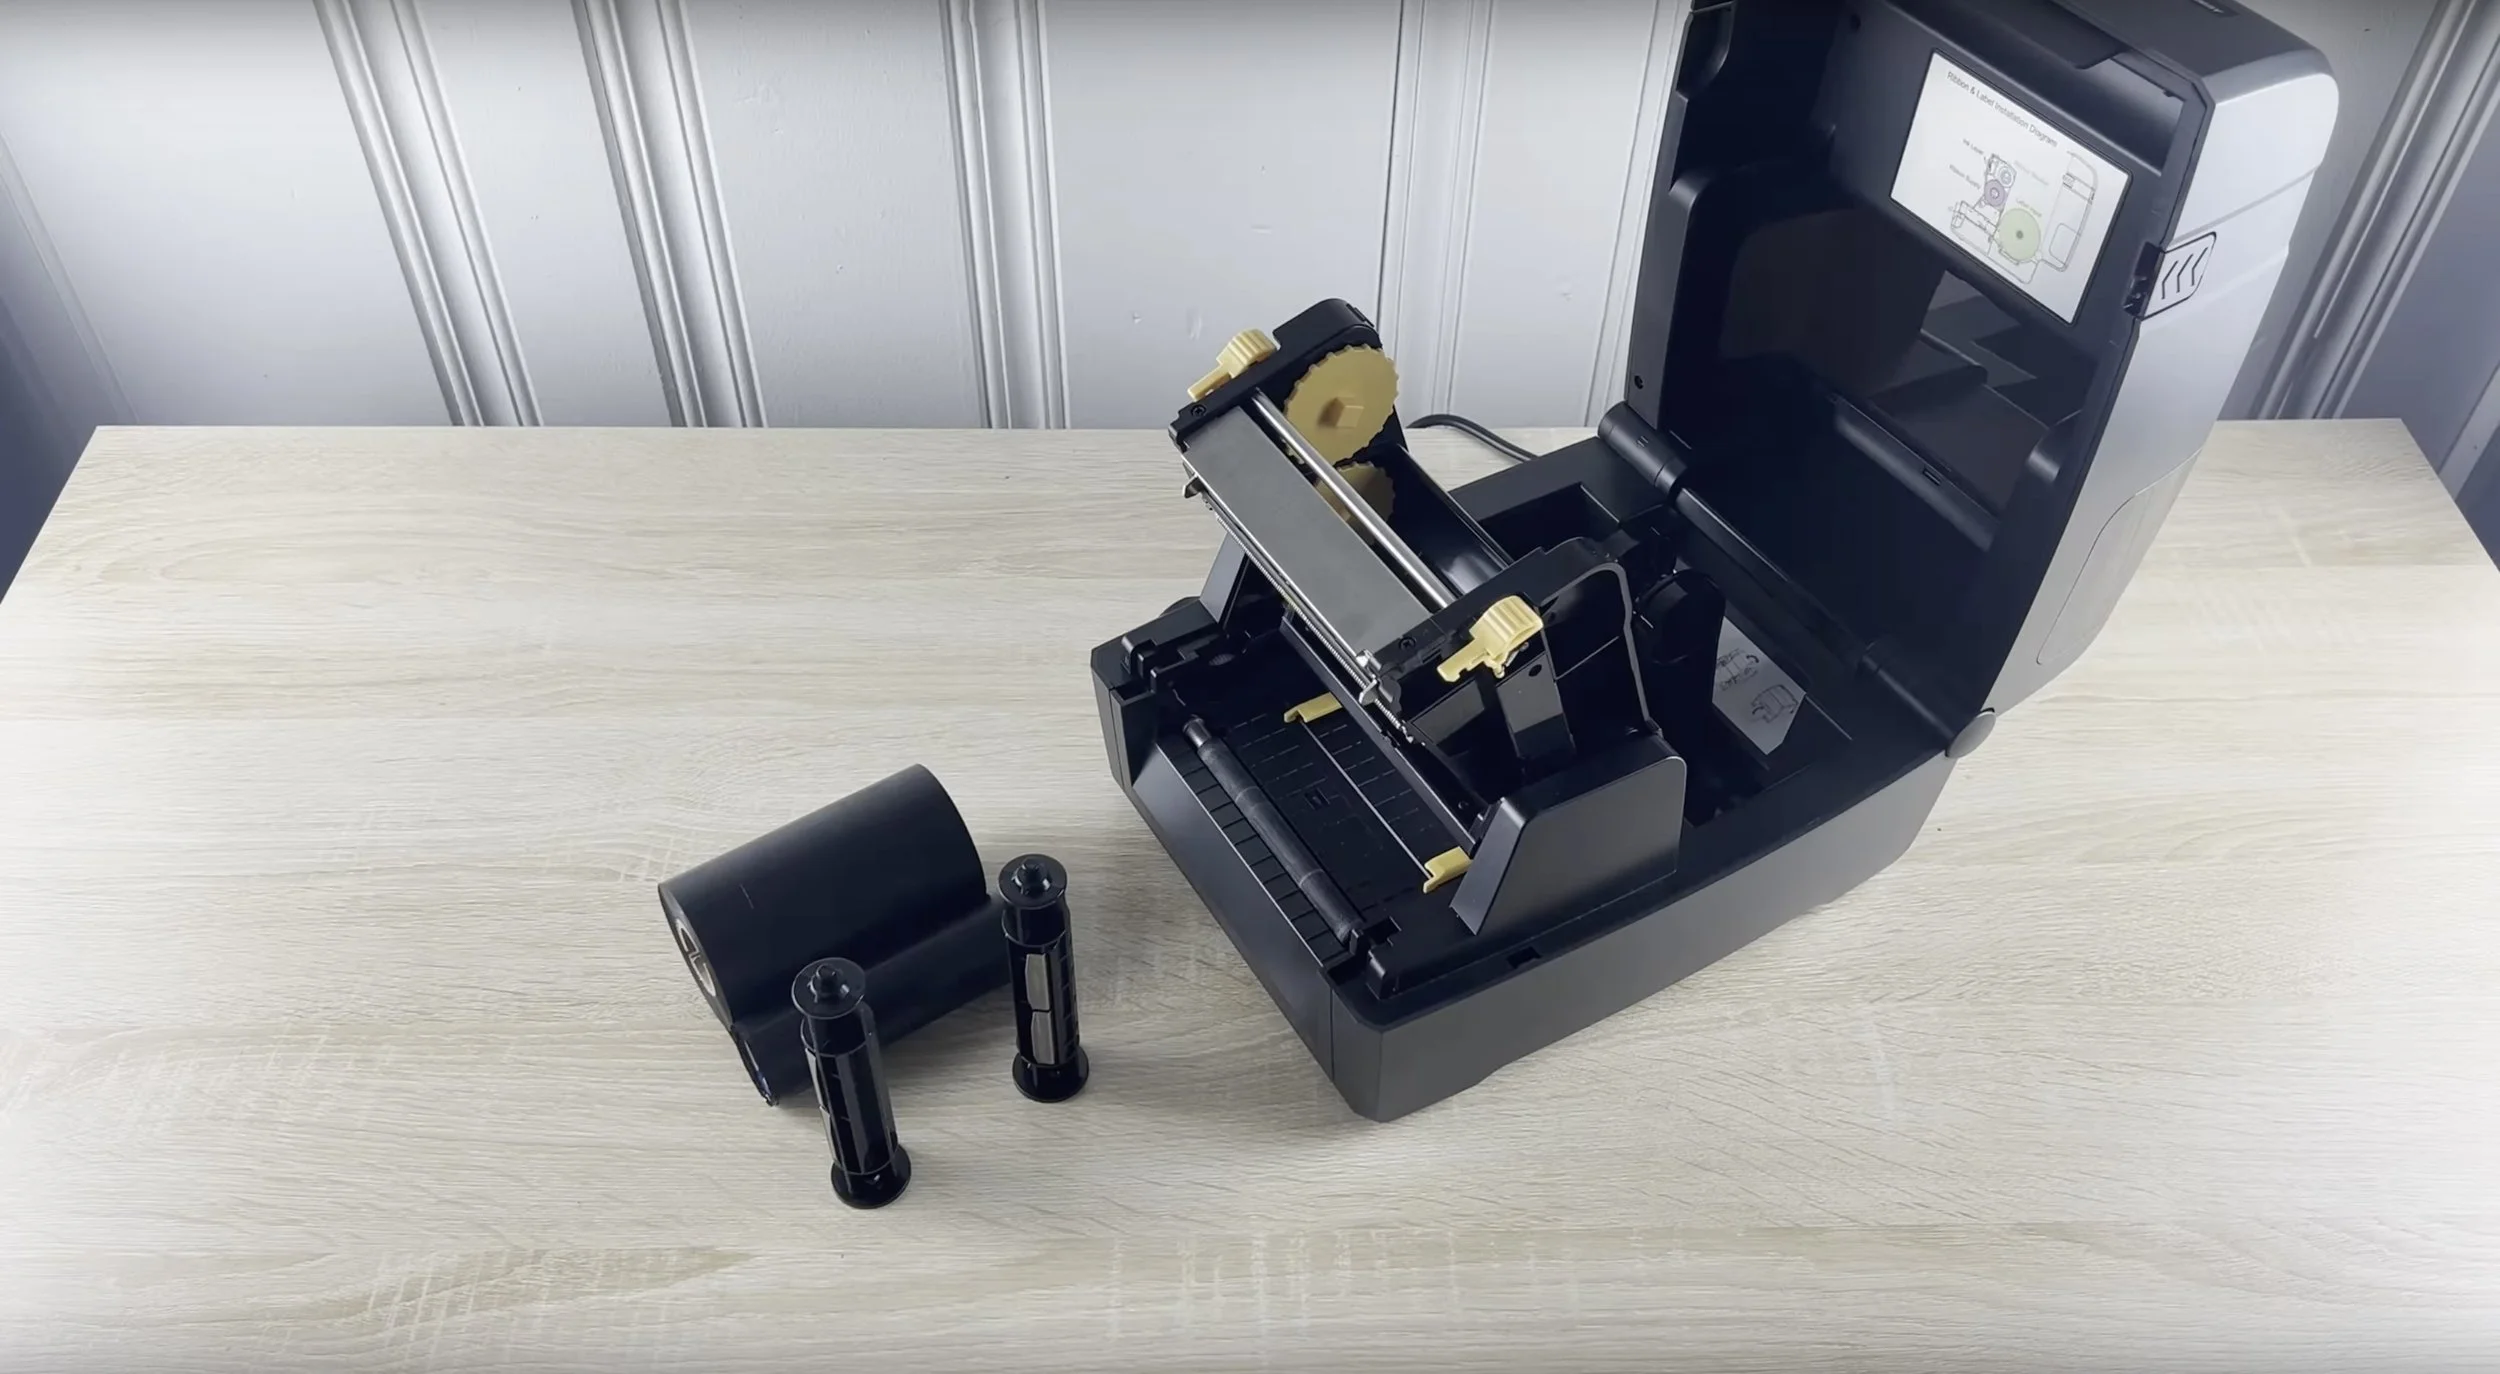
Each RFIDLinked Printer Bundle includes:
Thermal Transfer Ribbon
ARC-compatible tags
Power cable
USB data transfer cable
Pre-installed wireless module
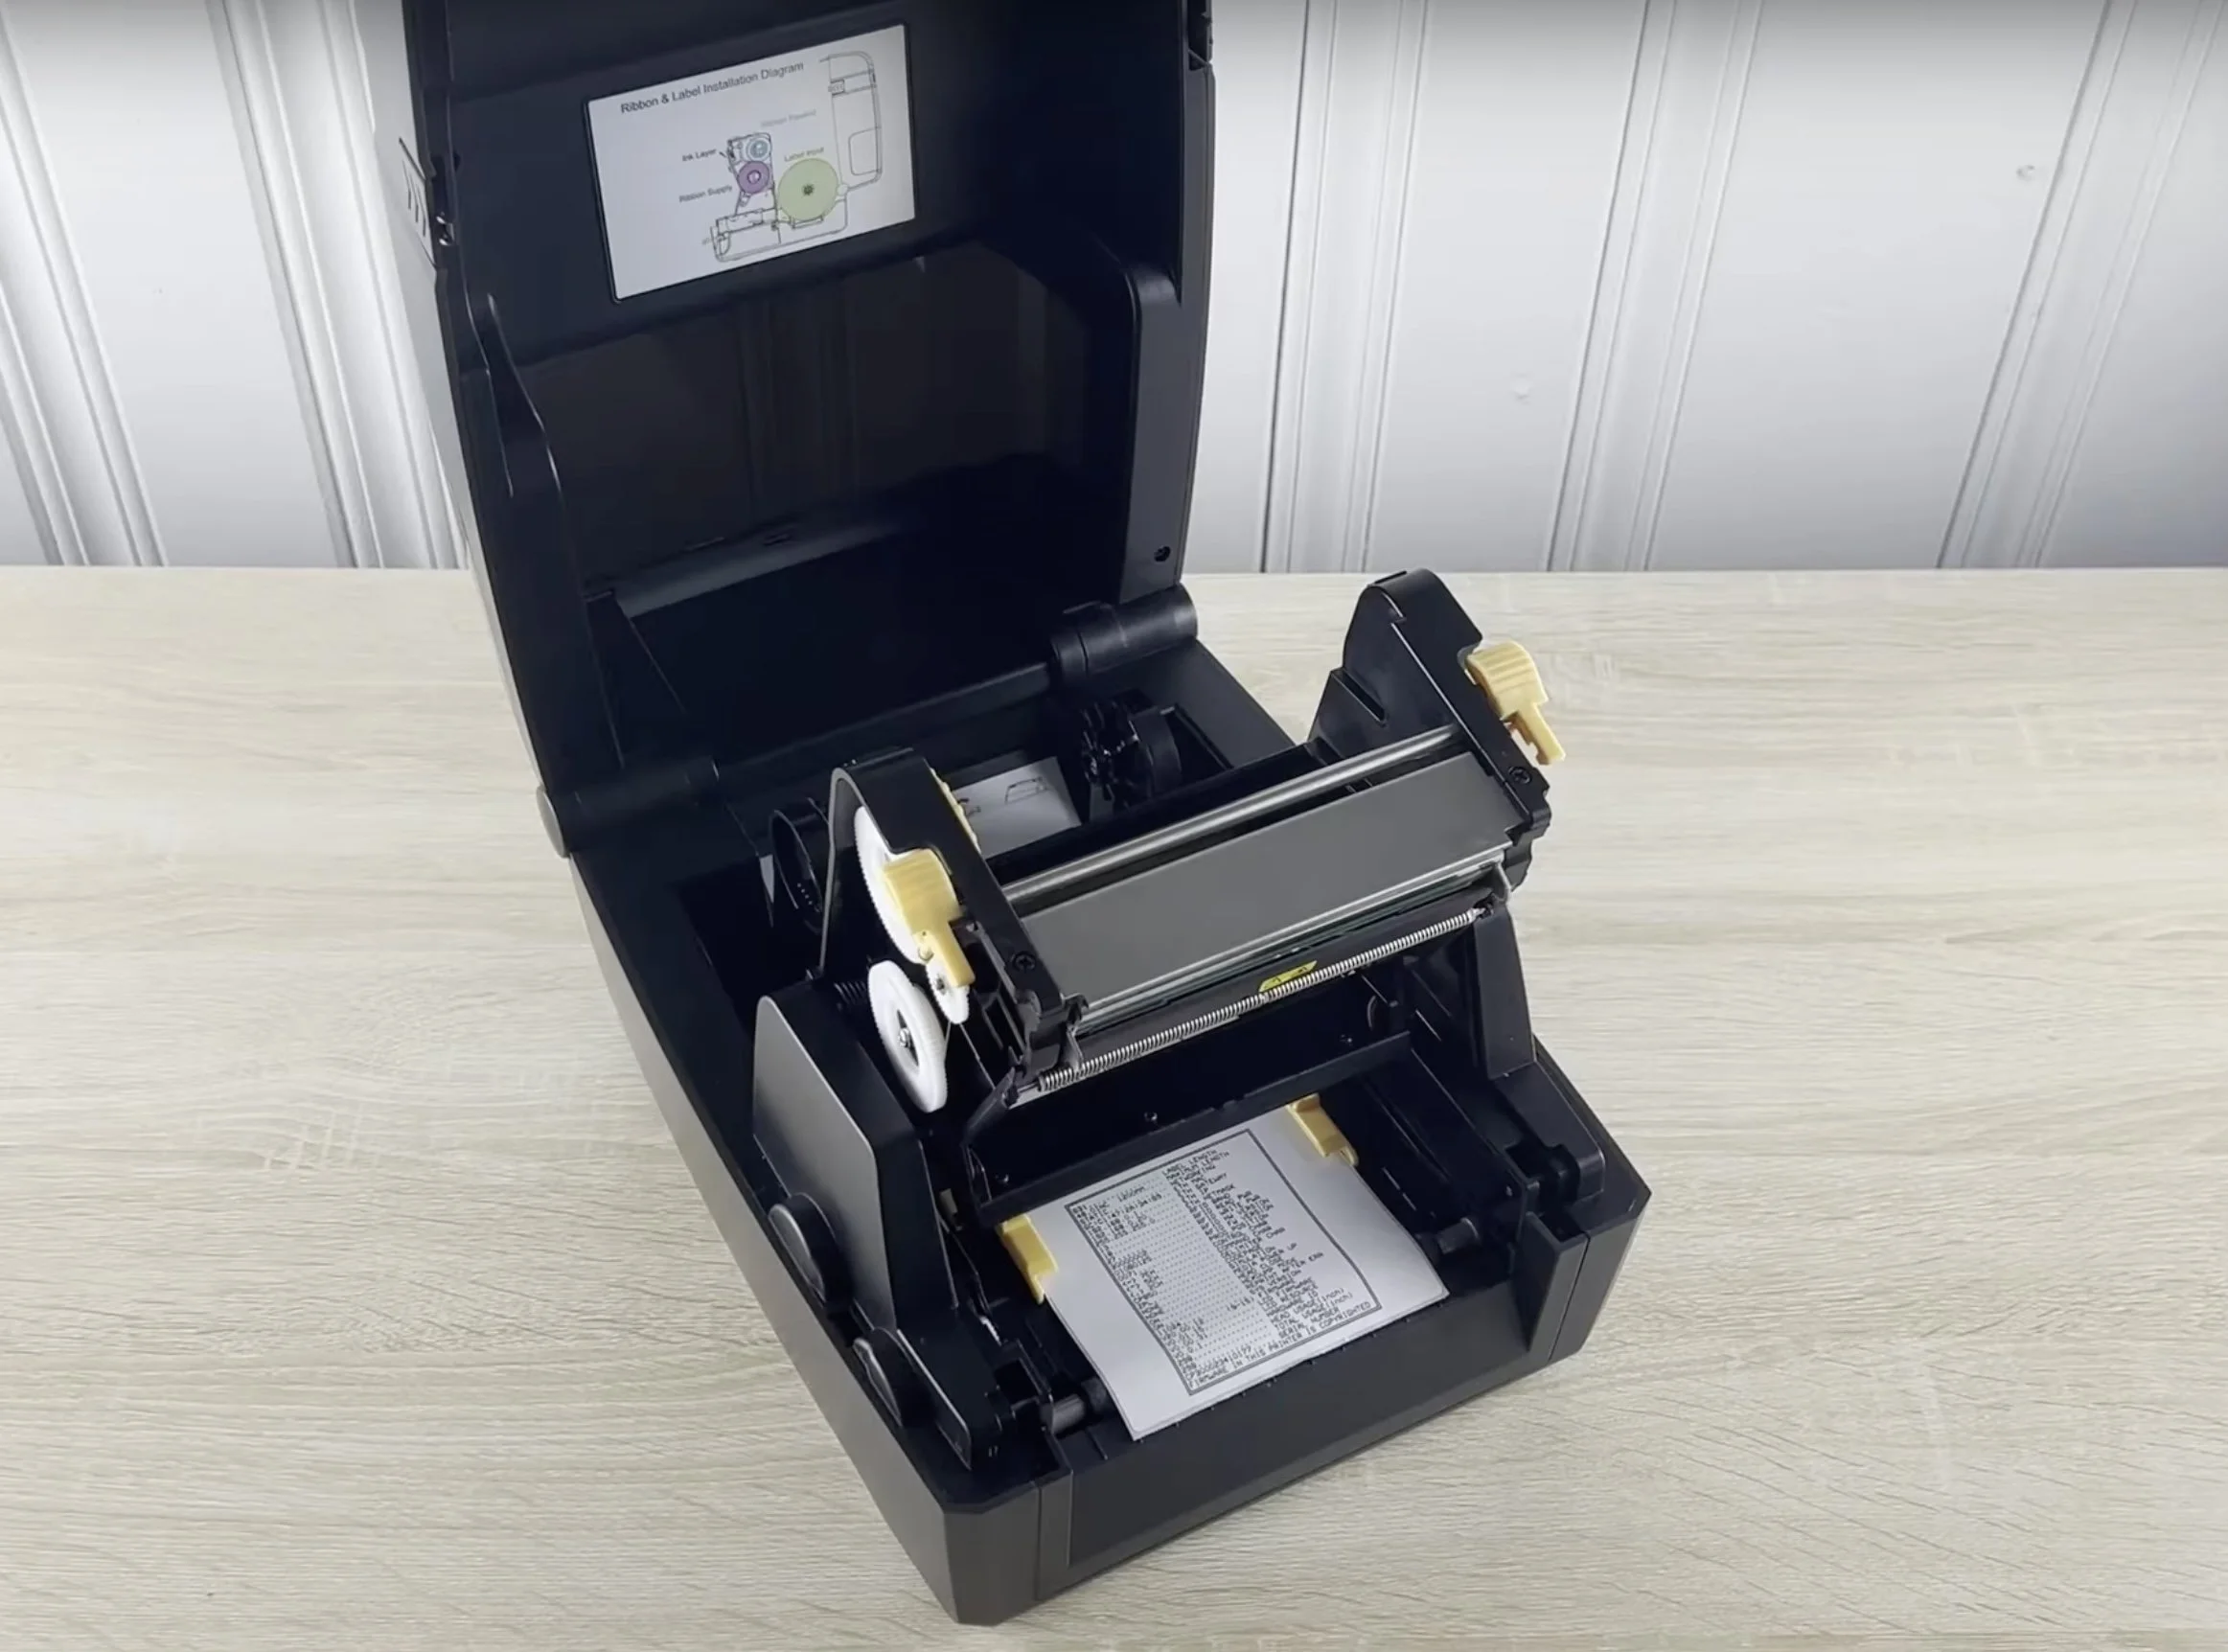
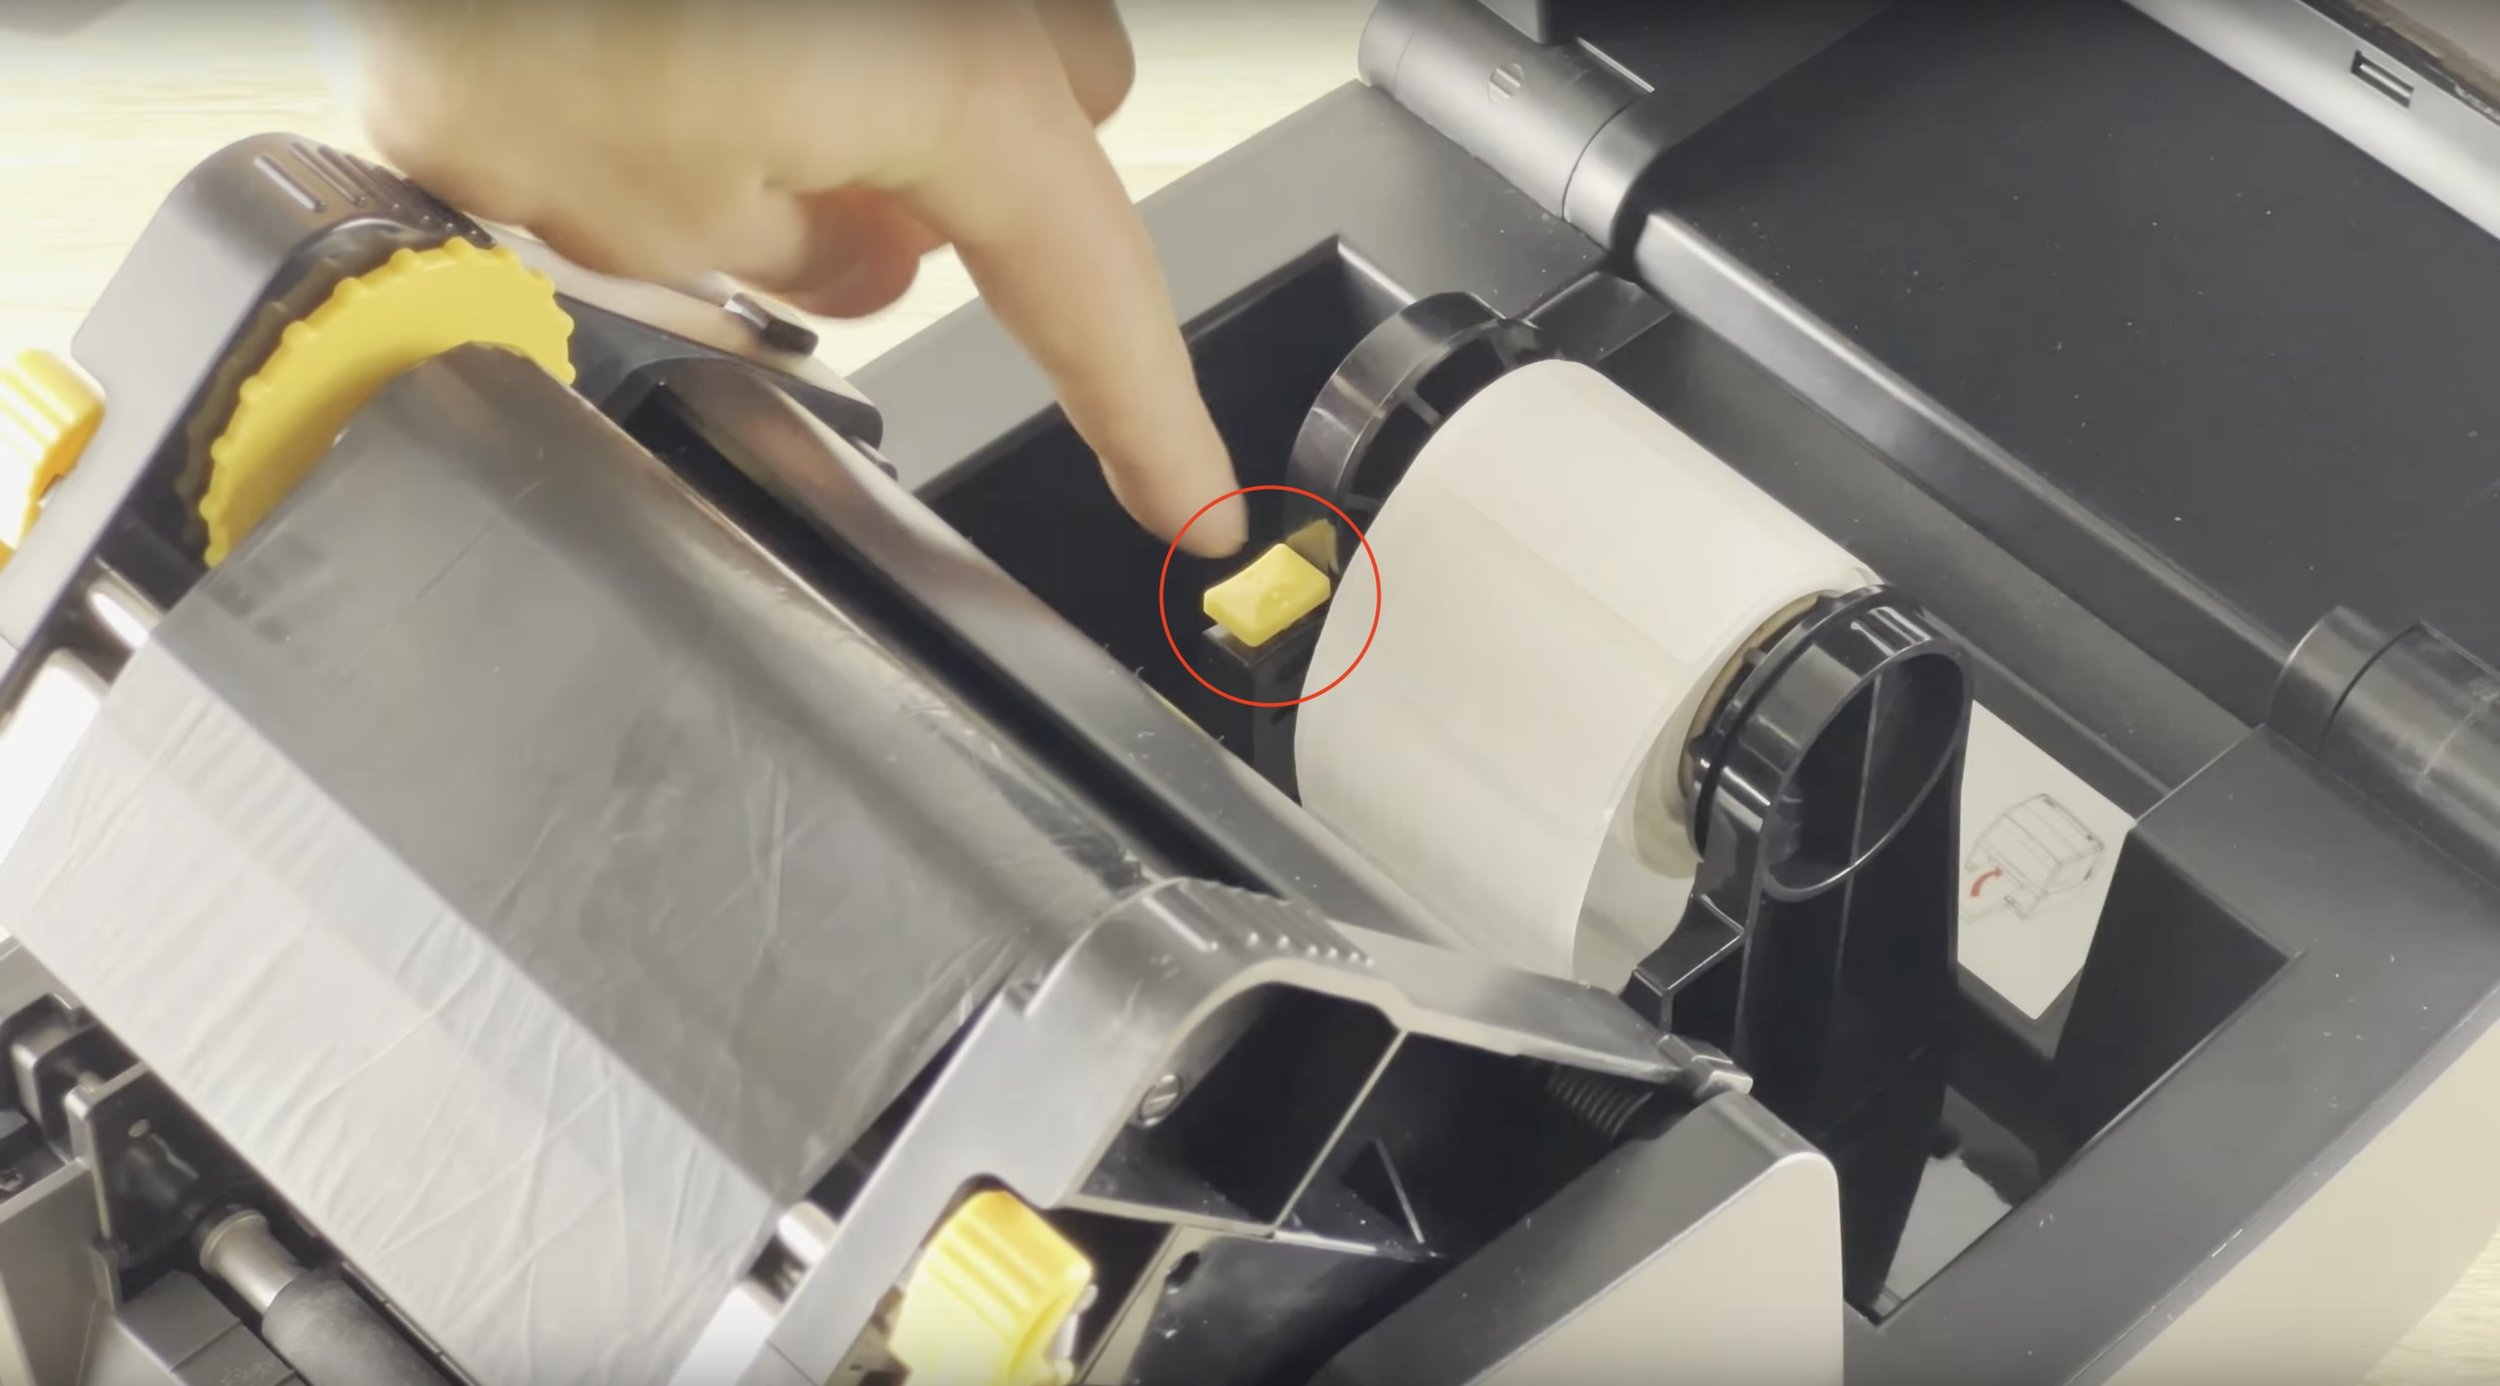
Prepare the Ribbon Carrier:
Open the ribbon carrier and remove the test label.
Insert the Ribbon Spool:
Each spool holder has a keyed side and can only be inserted one way.
Insert the holder's square portion from the left side of the ribbon.
Ensure it feeds the empty roll from the bottom.
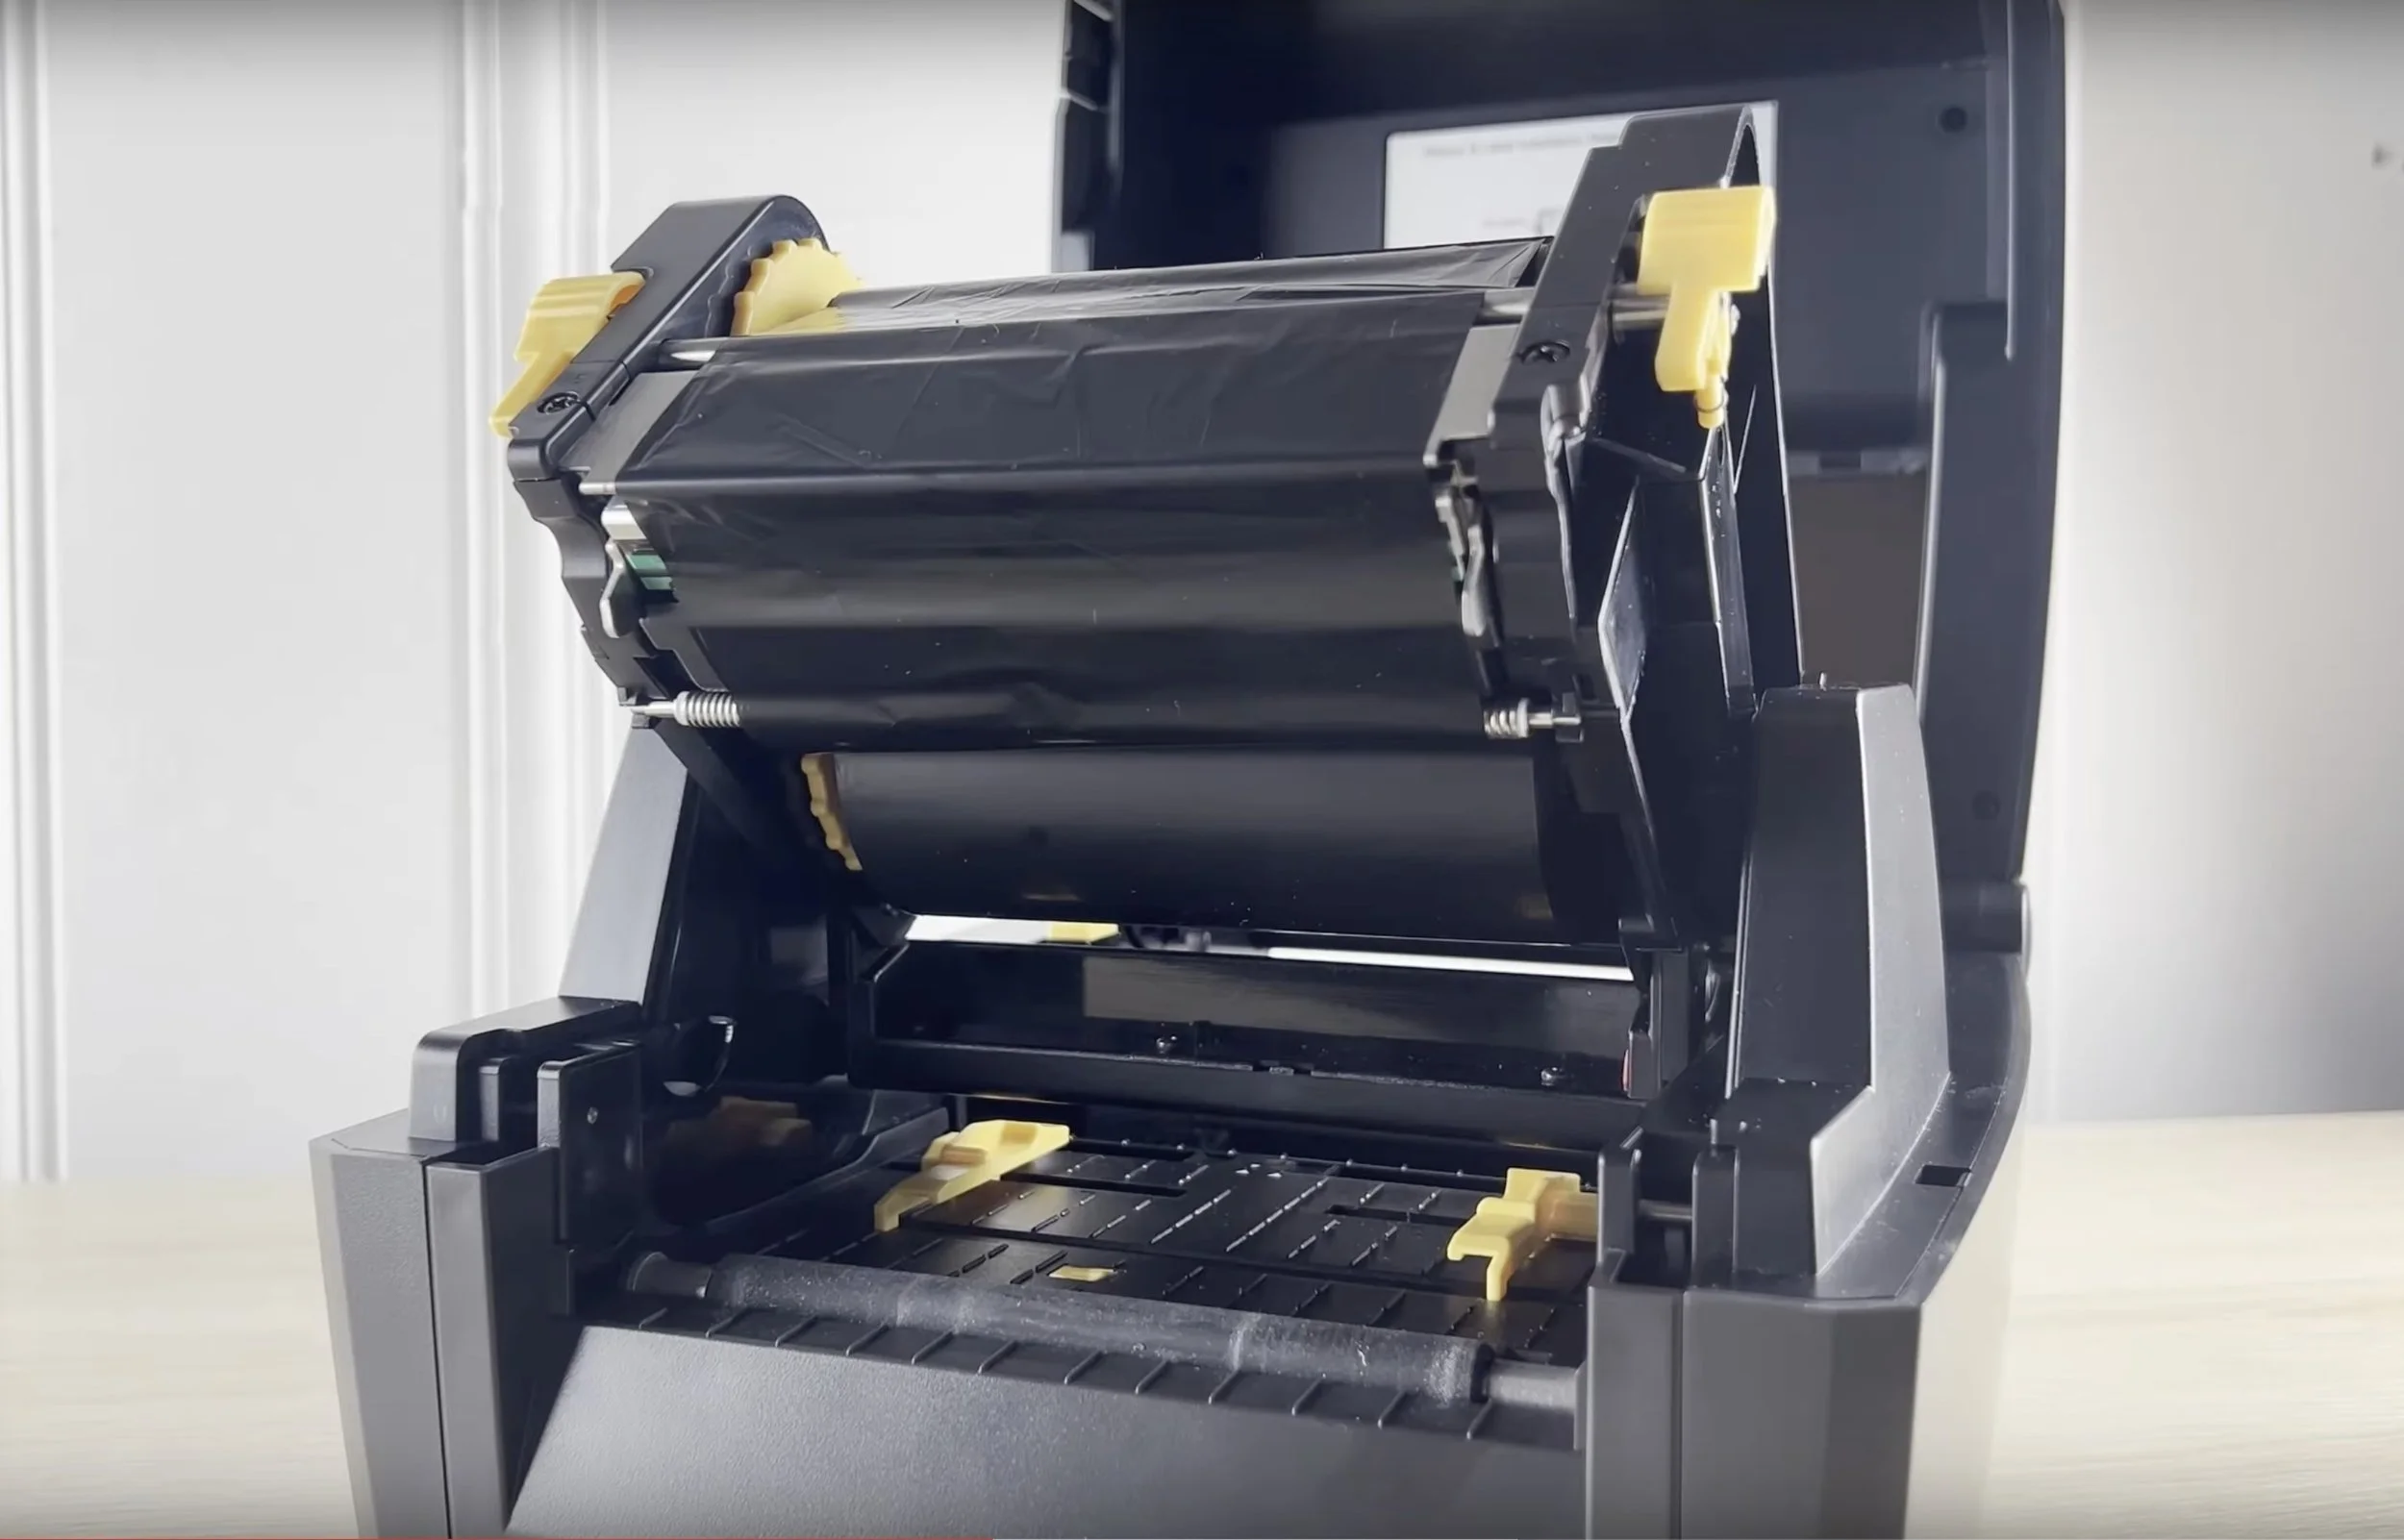
Load the Ribbon:
Insert the empty roll from the top, matching the square side to the carrier.
Insert the ribbon from the bottom of the carrier.
Adjust the yellow wheels on the carrier to take out some slack.
Refer to the Diagram:
Check the diagram at the bottom of the printer for correct tag orientation.
Adjust the Tag Holder:
Release the tag holder by pulling up on the yellow tab.
Insert the spool of ARC-approved tags.
Secure the tags by pressing down on the yellow tab.
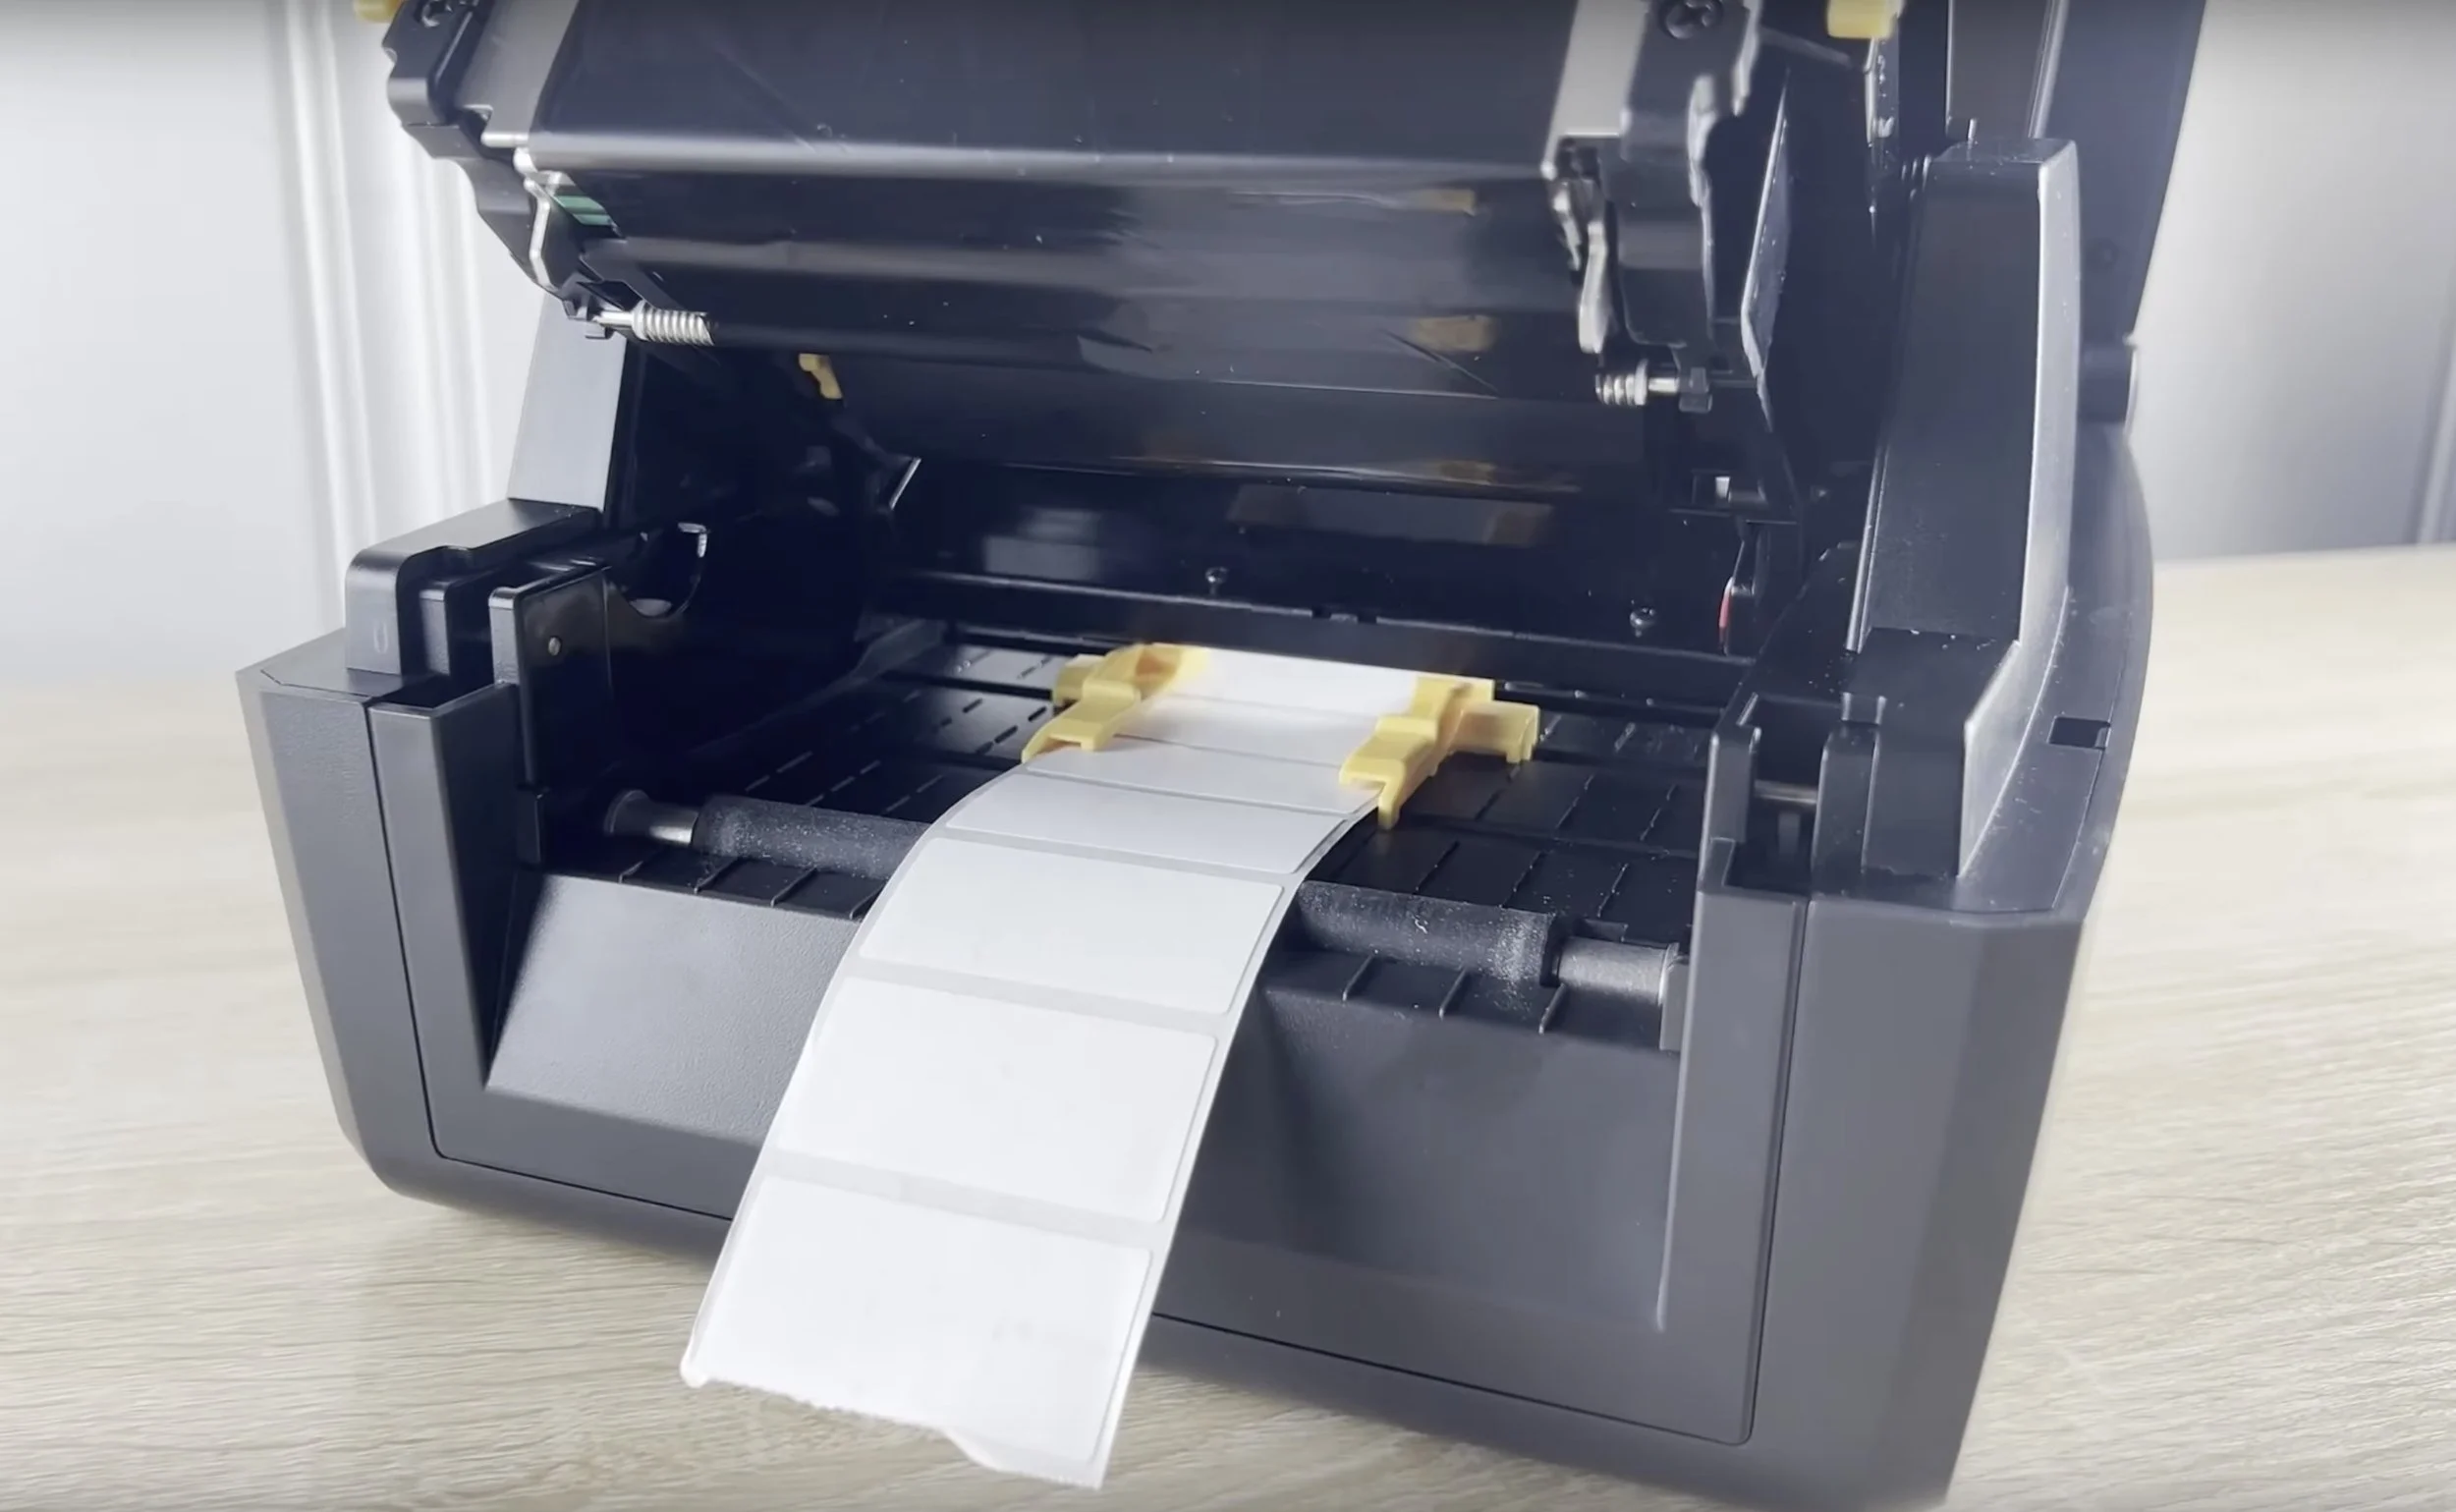
Feed the Tags:
Adjust the guides under the ribbon carrier to fit your tag size.
Ensure the tags feed through without snagging.
Close the Carrier and Clam-shell.
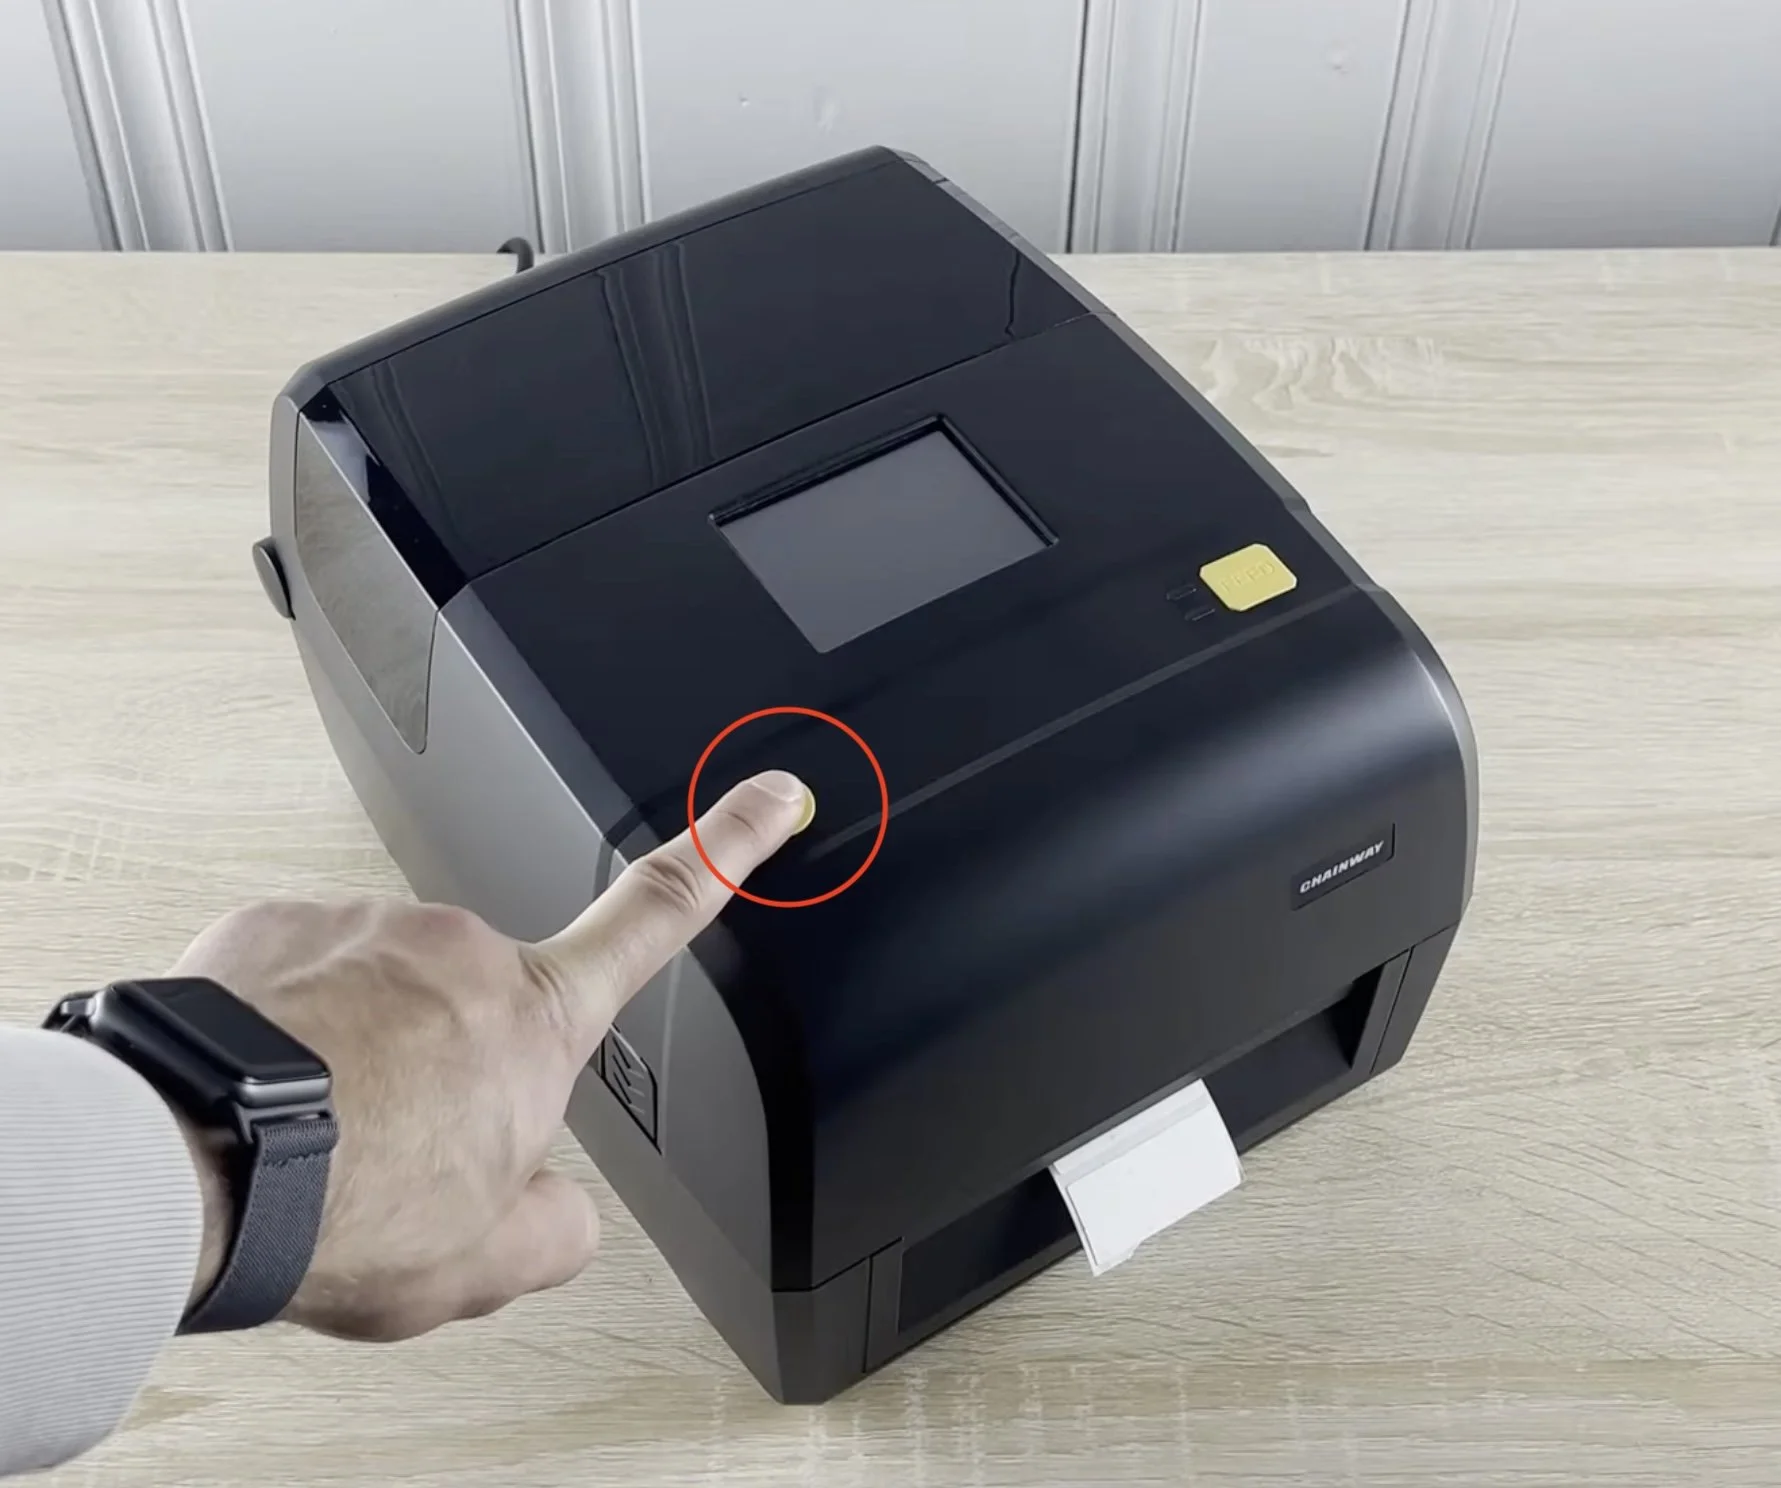
Turn On the Printer:
Hold down the power button for at least 3 seconds.
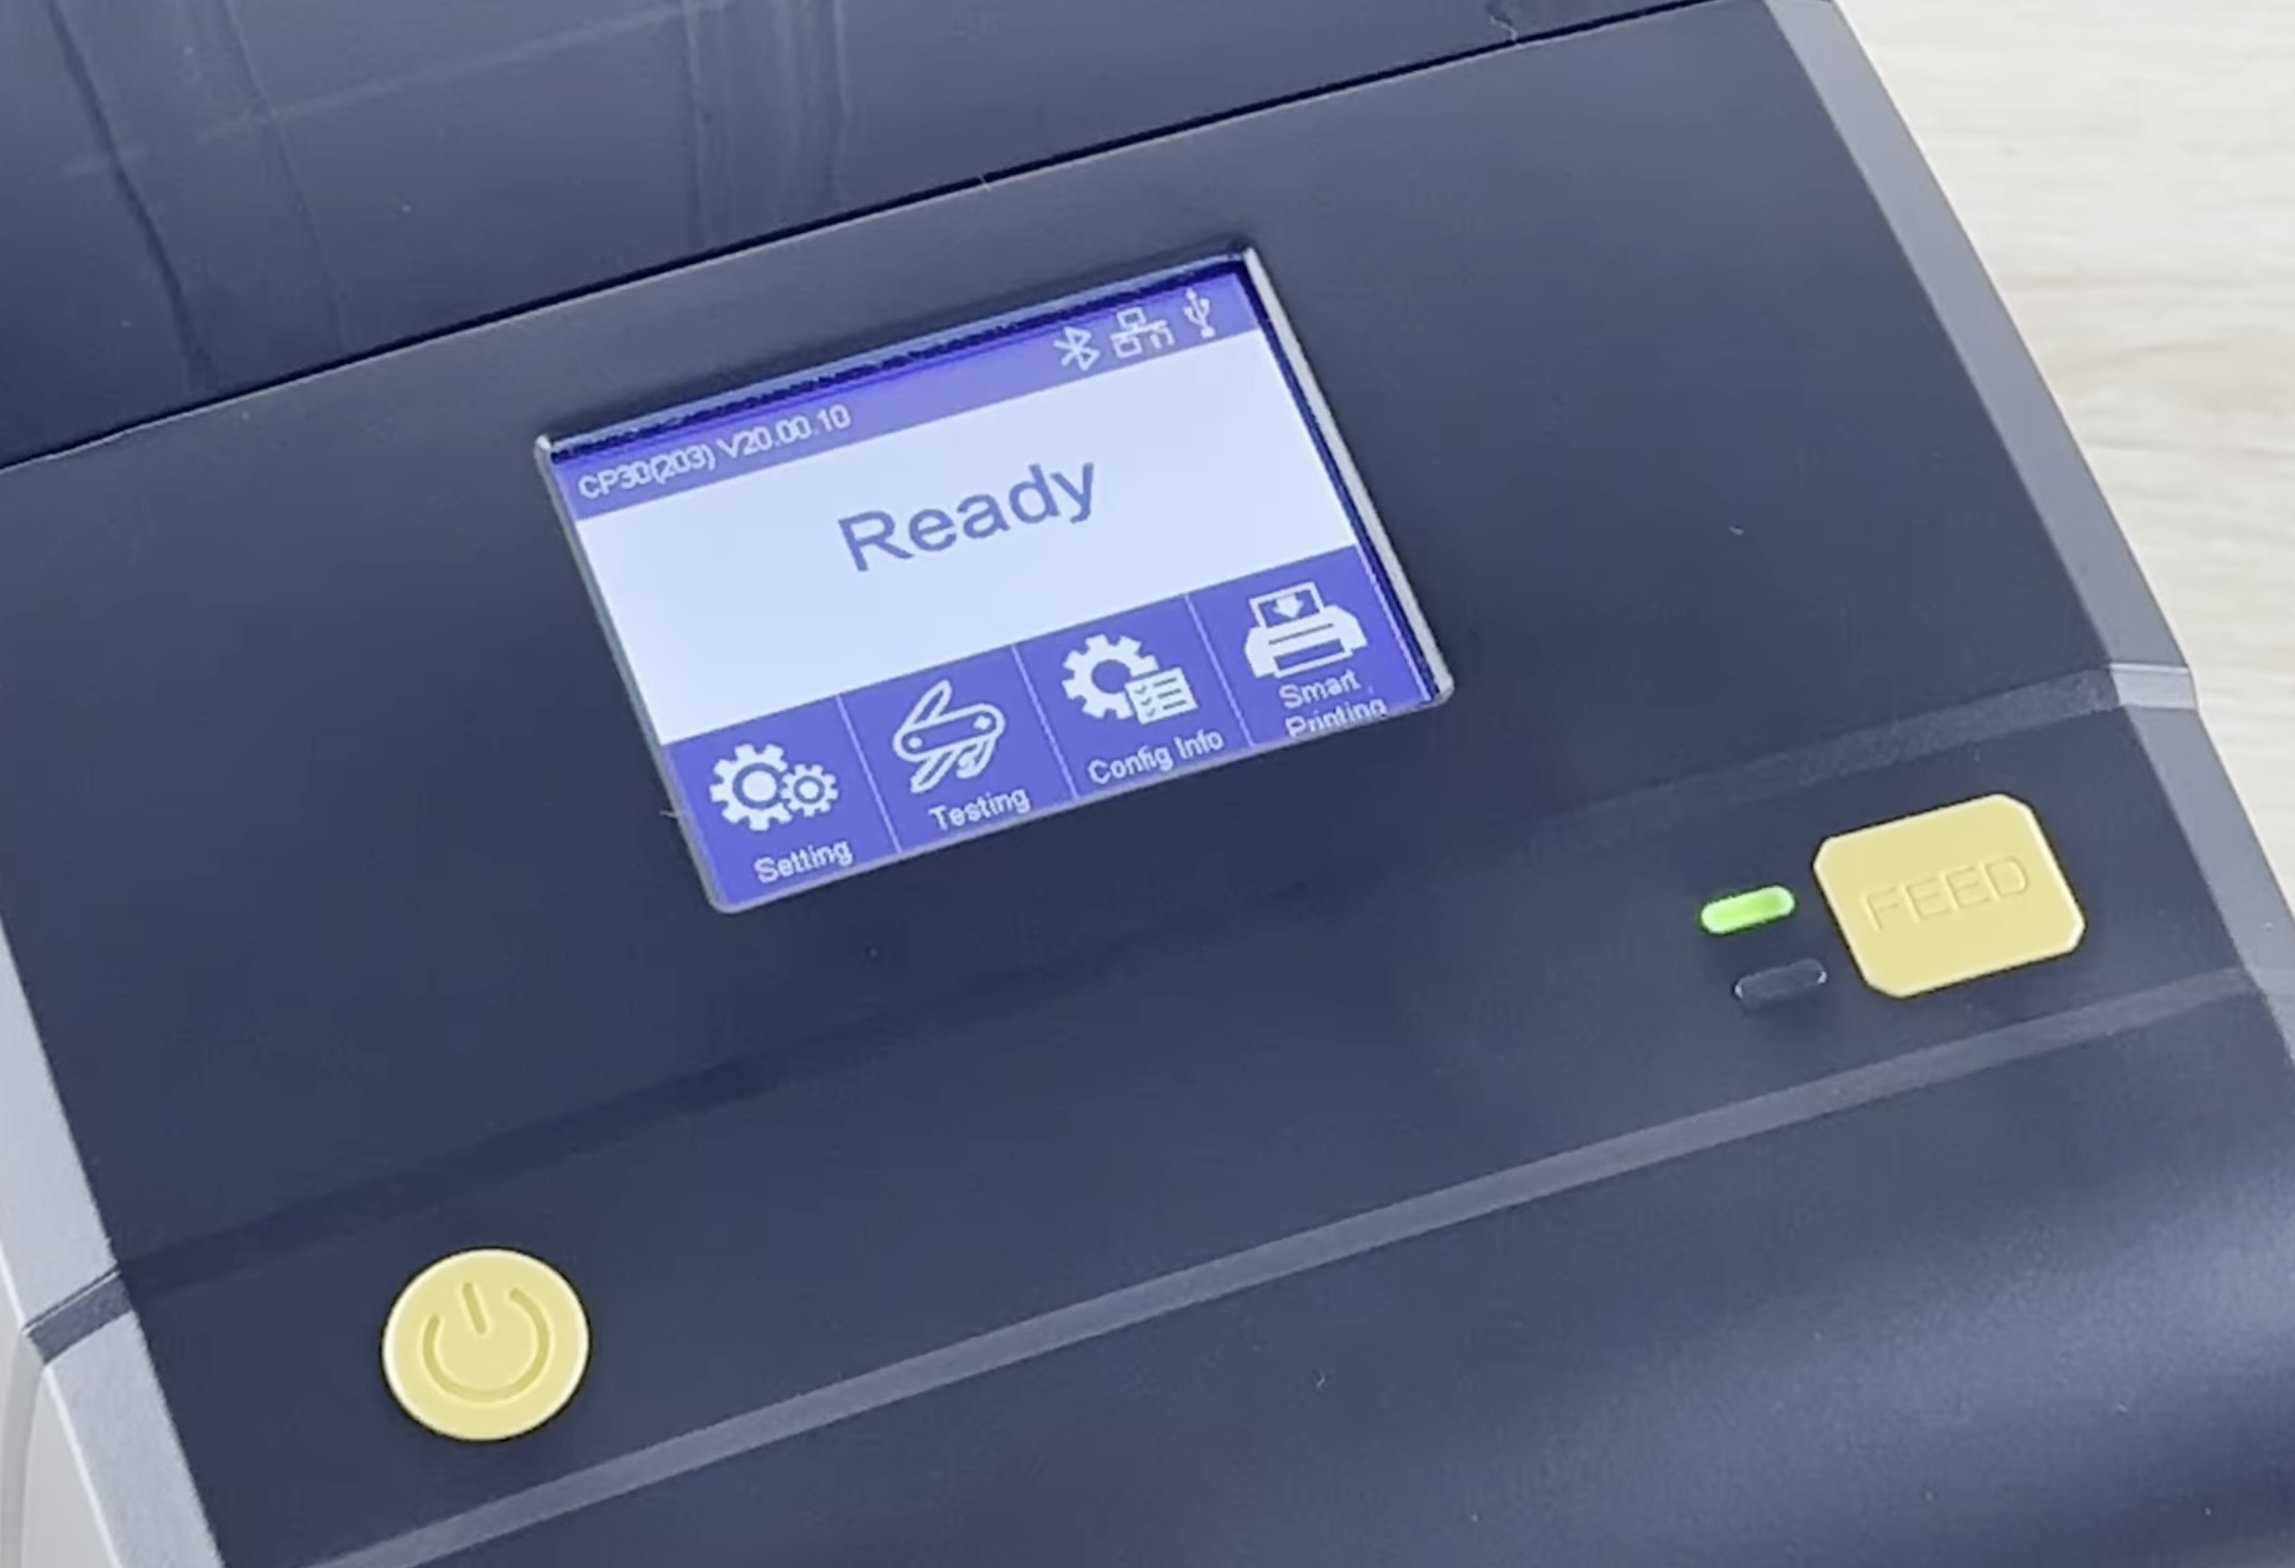
Display Overview:
Top left: Firmware version.
Top right: Connectivity status.
Bottom left: Printer settings, testing, configuration info, and smart printing options.
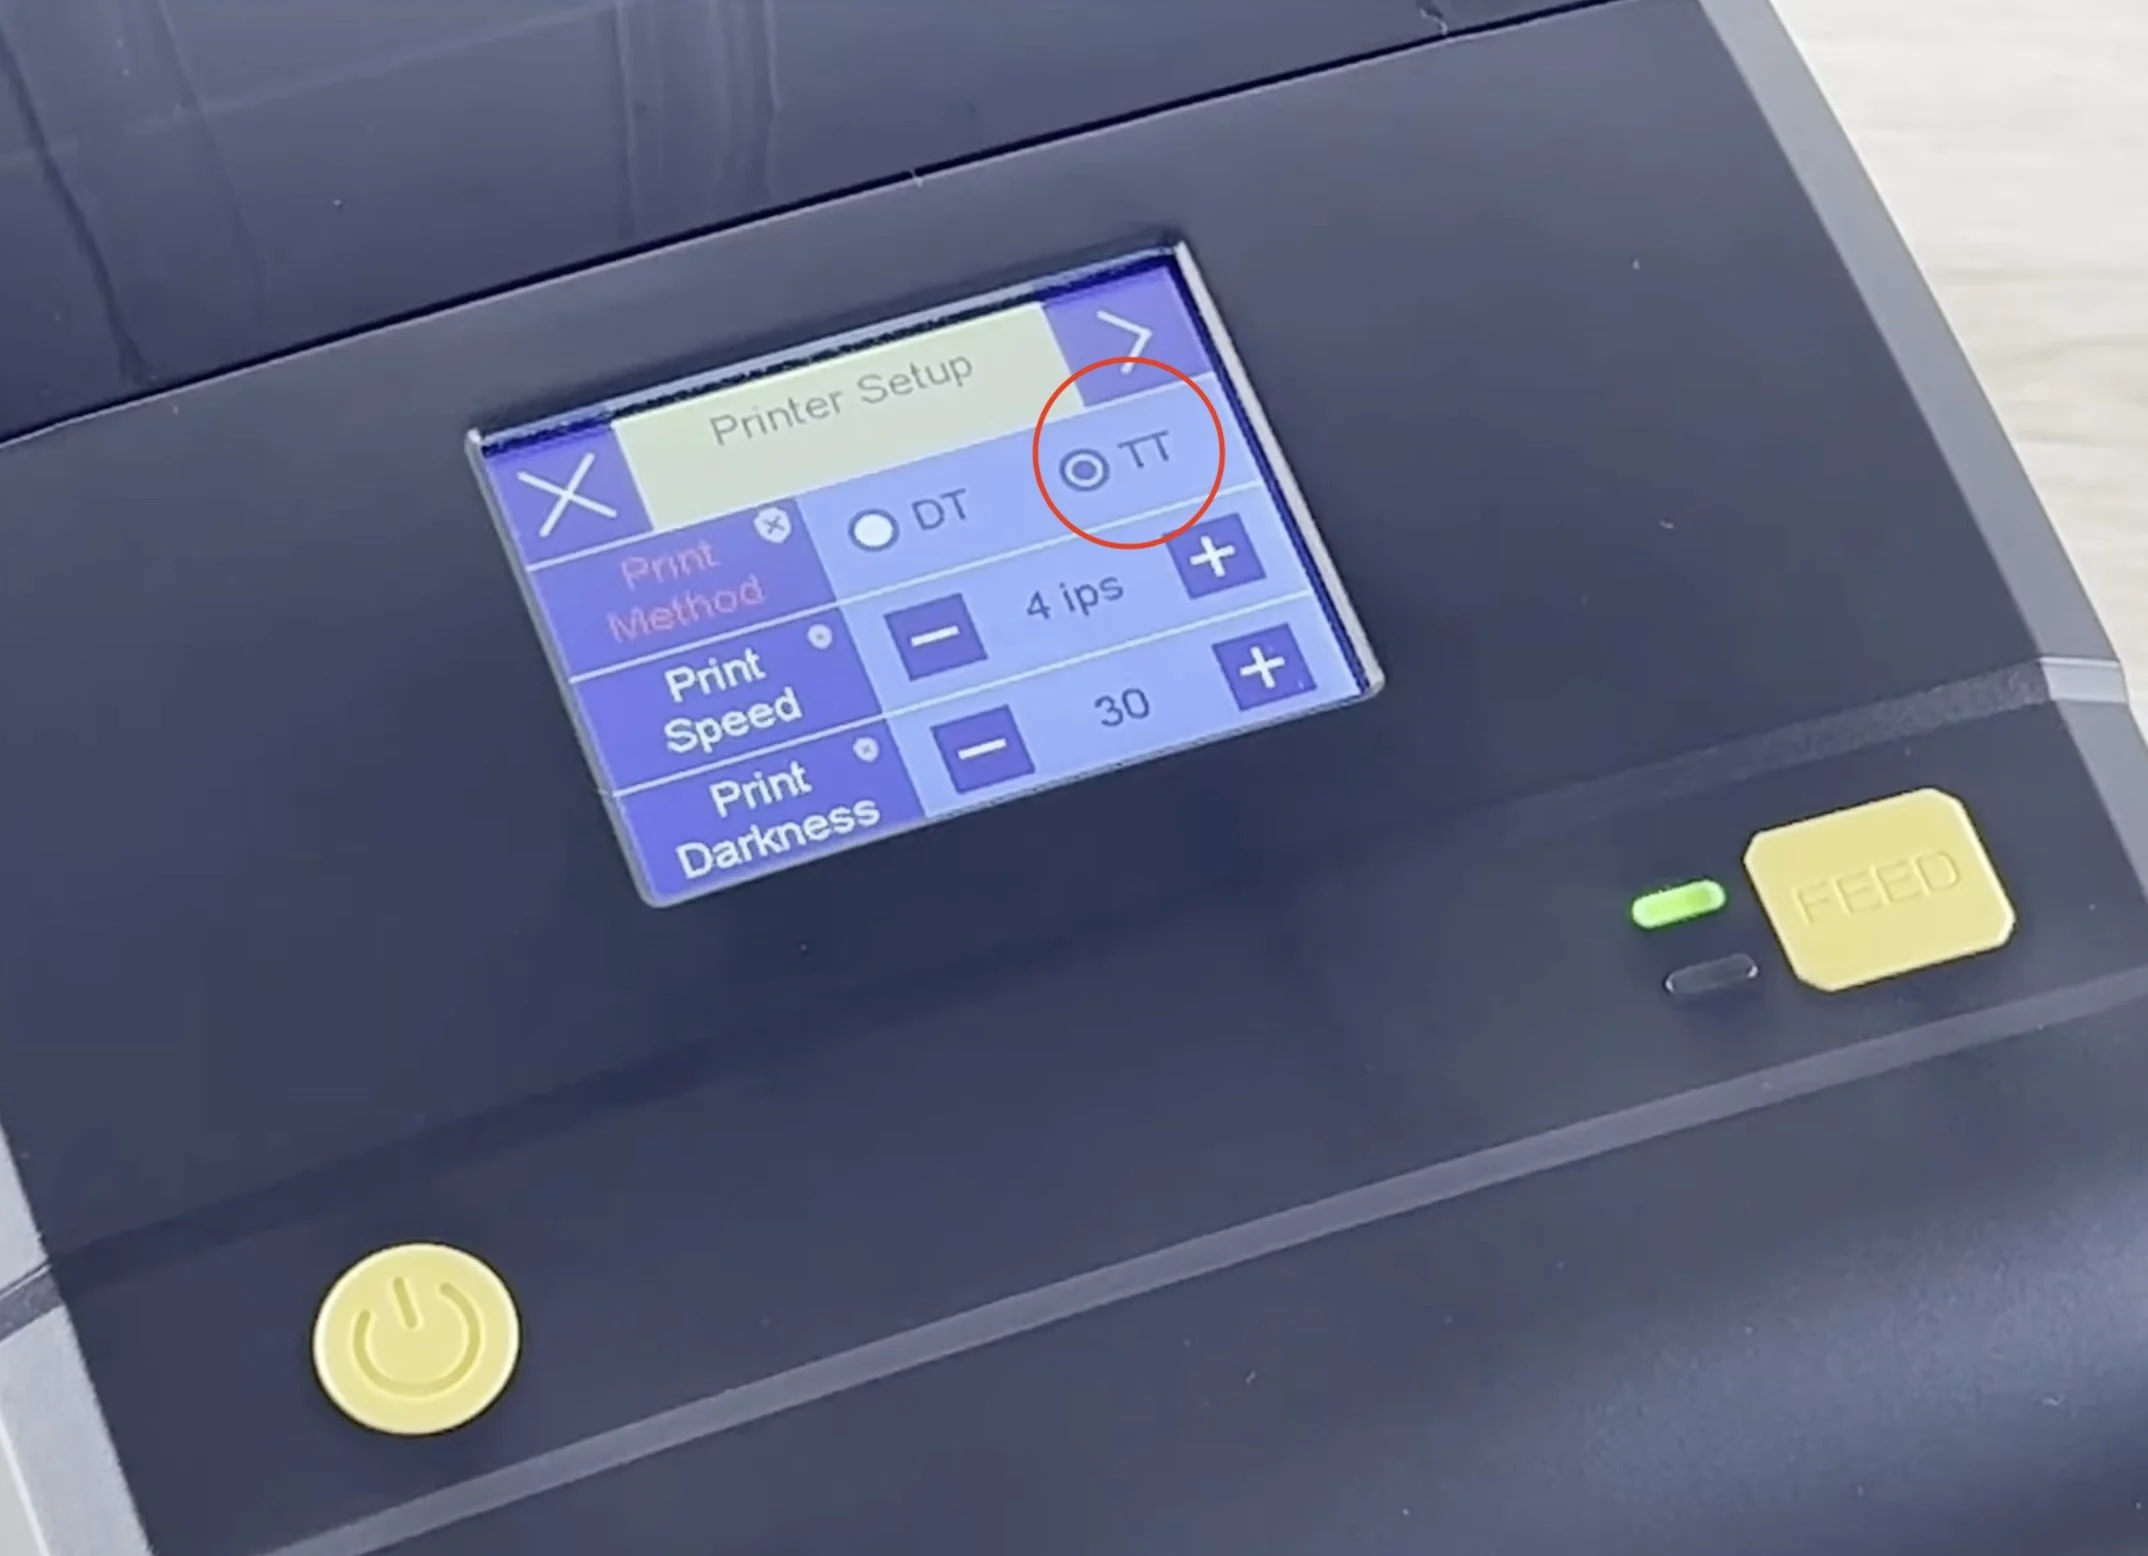
Printer Setup:
Select Settings > Printer Setup
Ensure the printer method is set to “TT” (Thermal Transfer). If set to Direct Thermal, switch to “TT”.
Confirm the default rotation is set to 180. Save the settings.
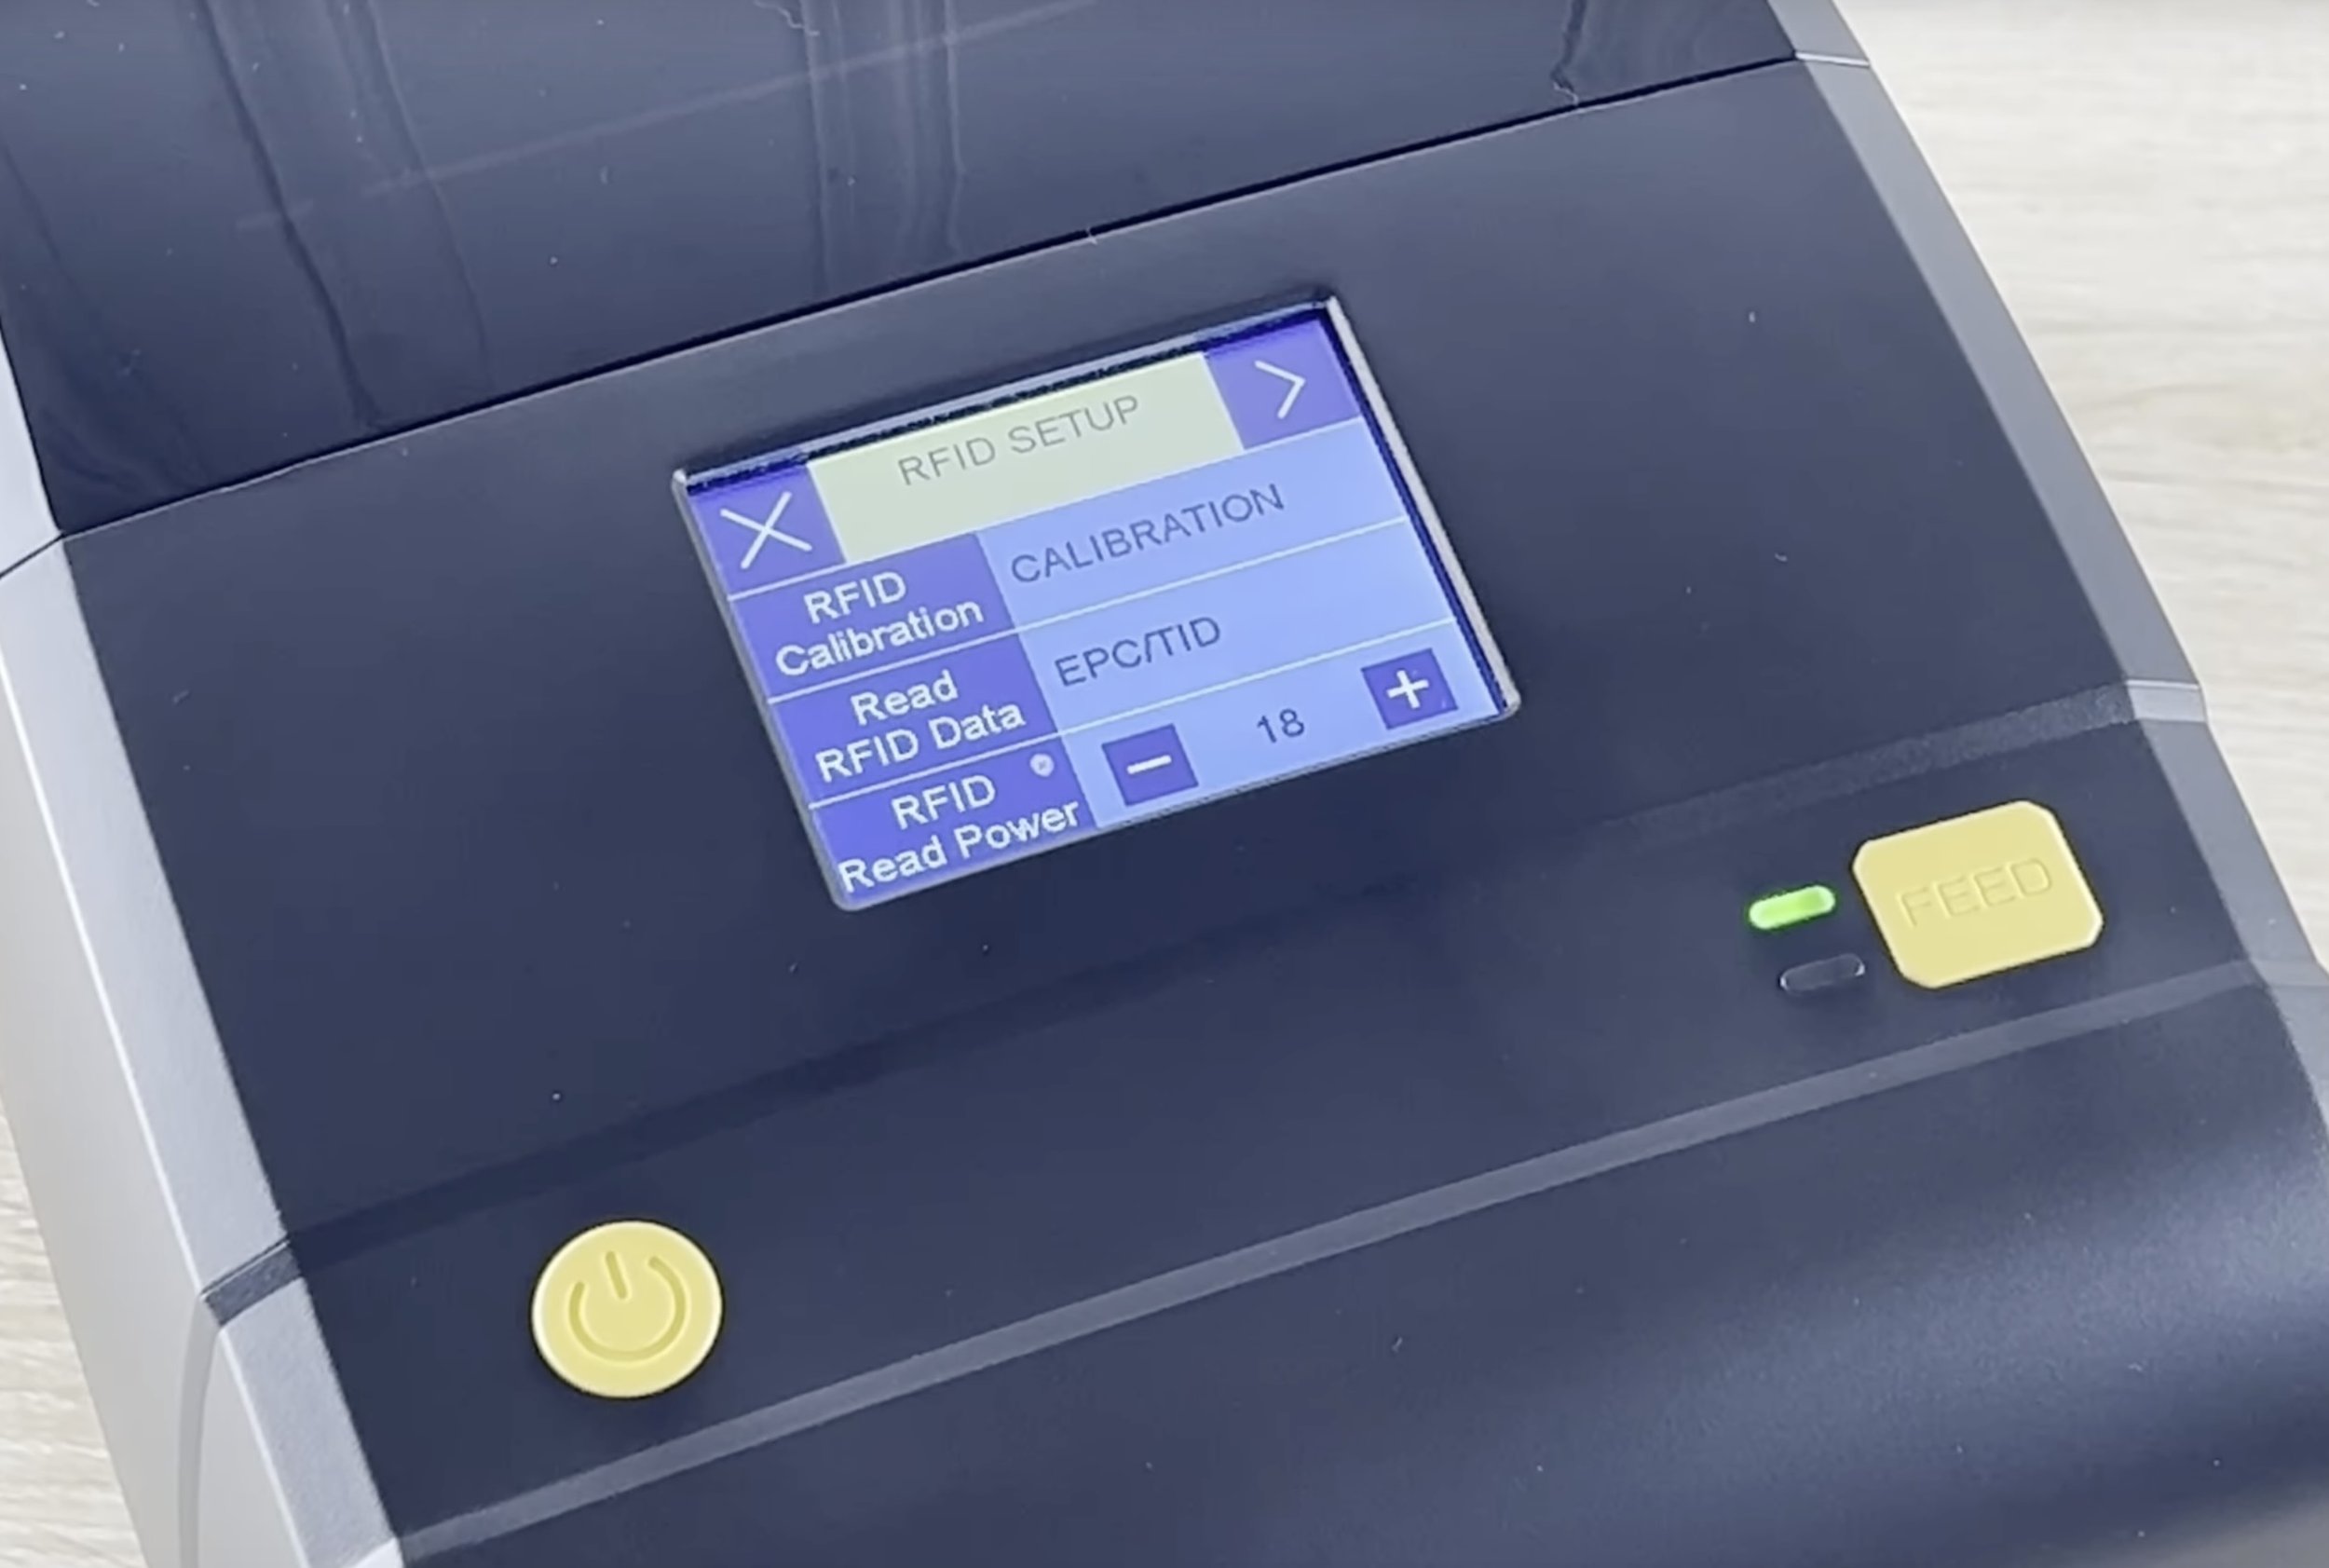
RFID Setup:
Select Settings > RFID Setup > Calibration
This will calibrate the printer with the chip on your RFID tags ensuring it is able to properly communicate with them.
NOTE: It is recommended that you re-run the RFID Calibration anytime you change a roll of tags.
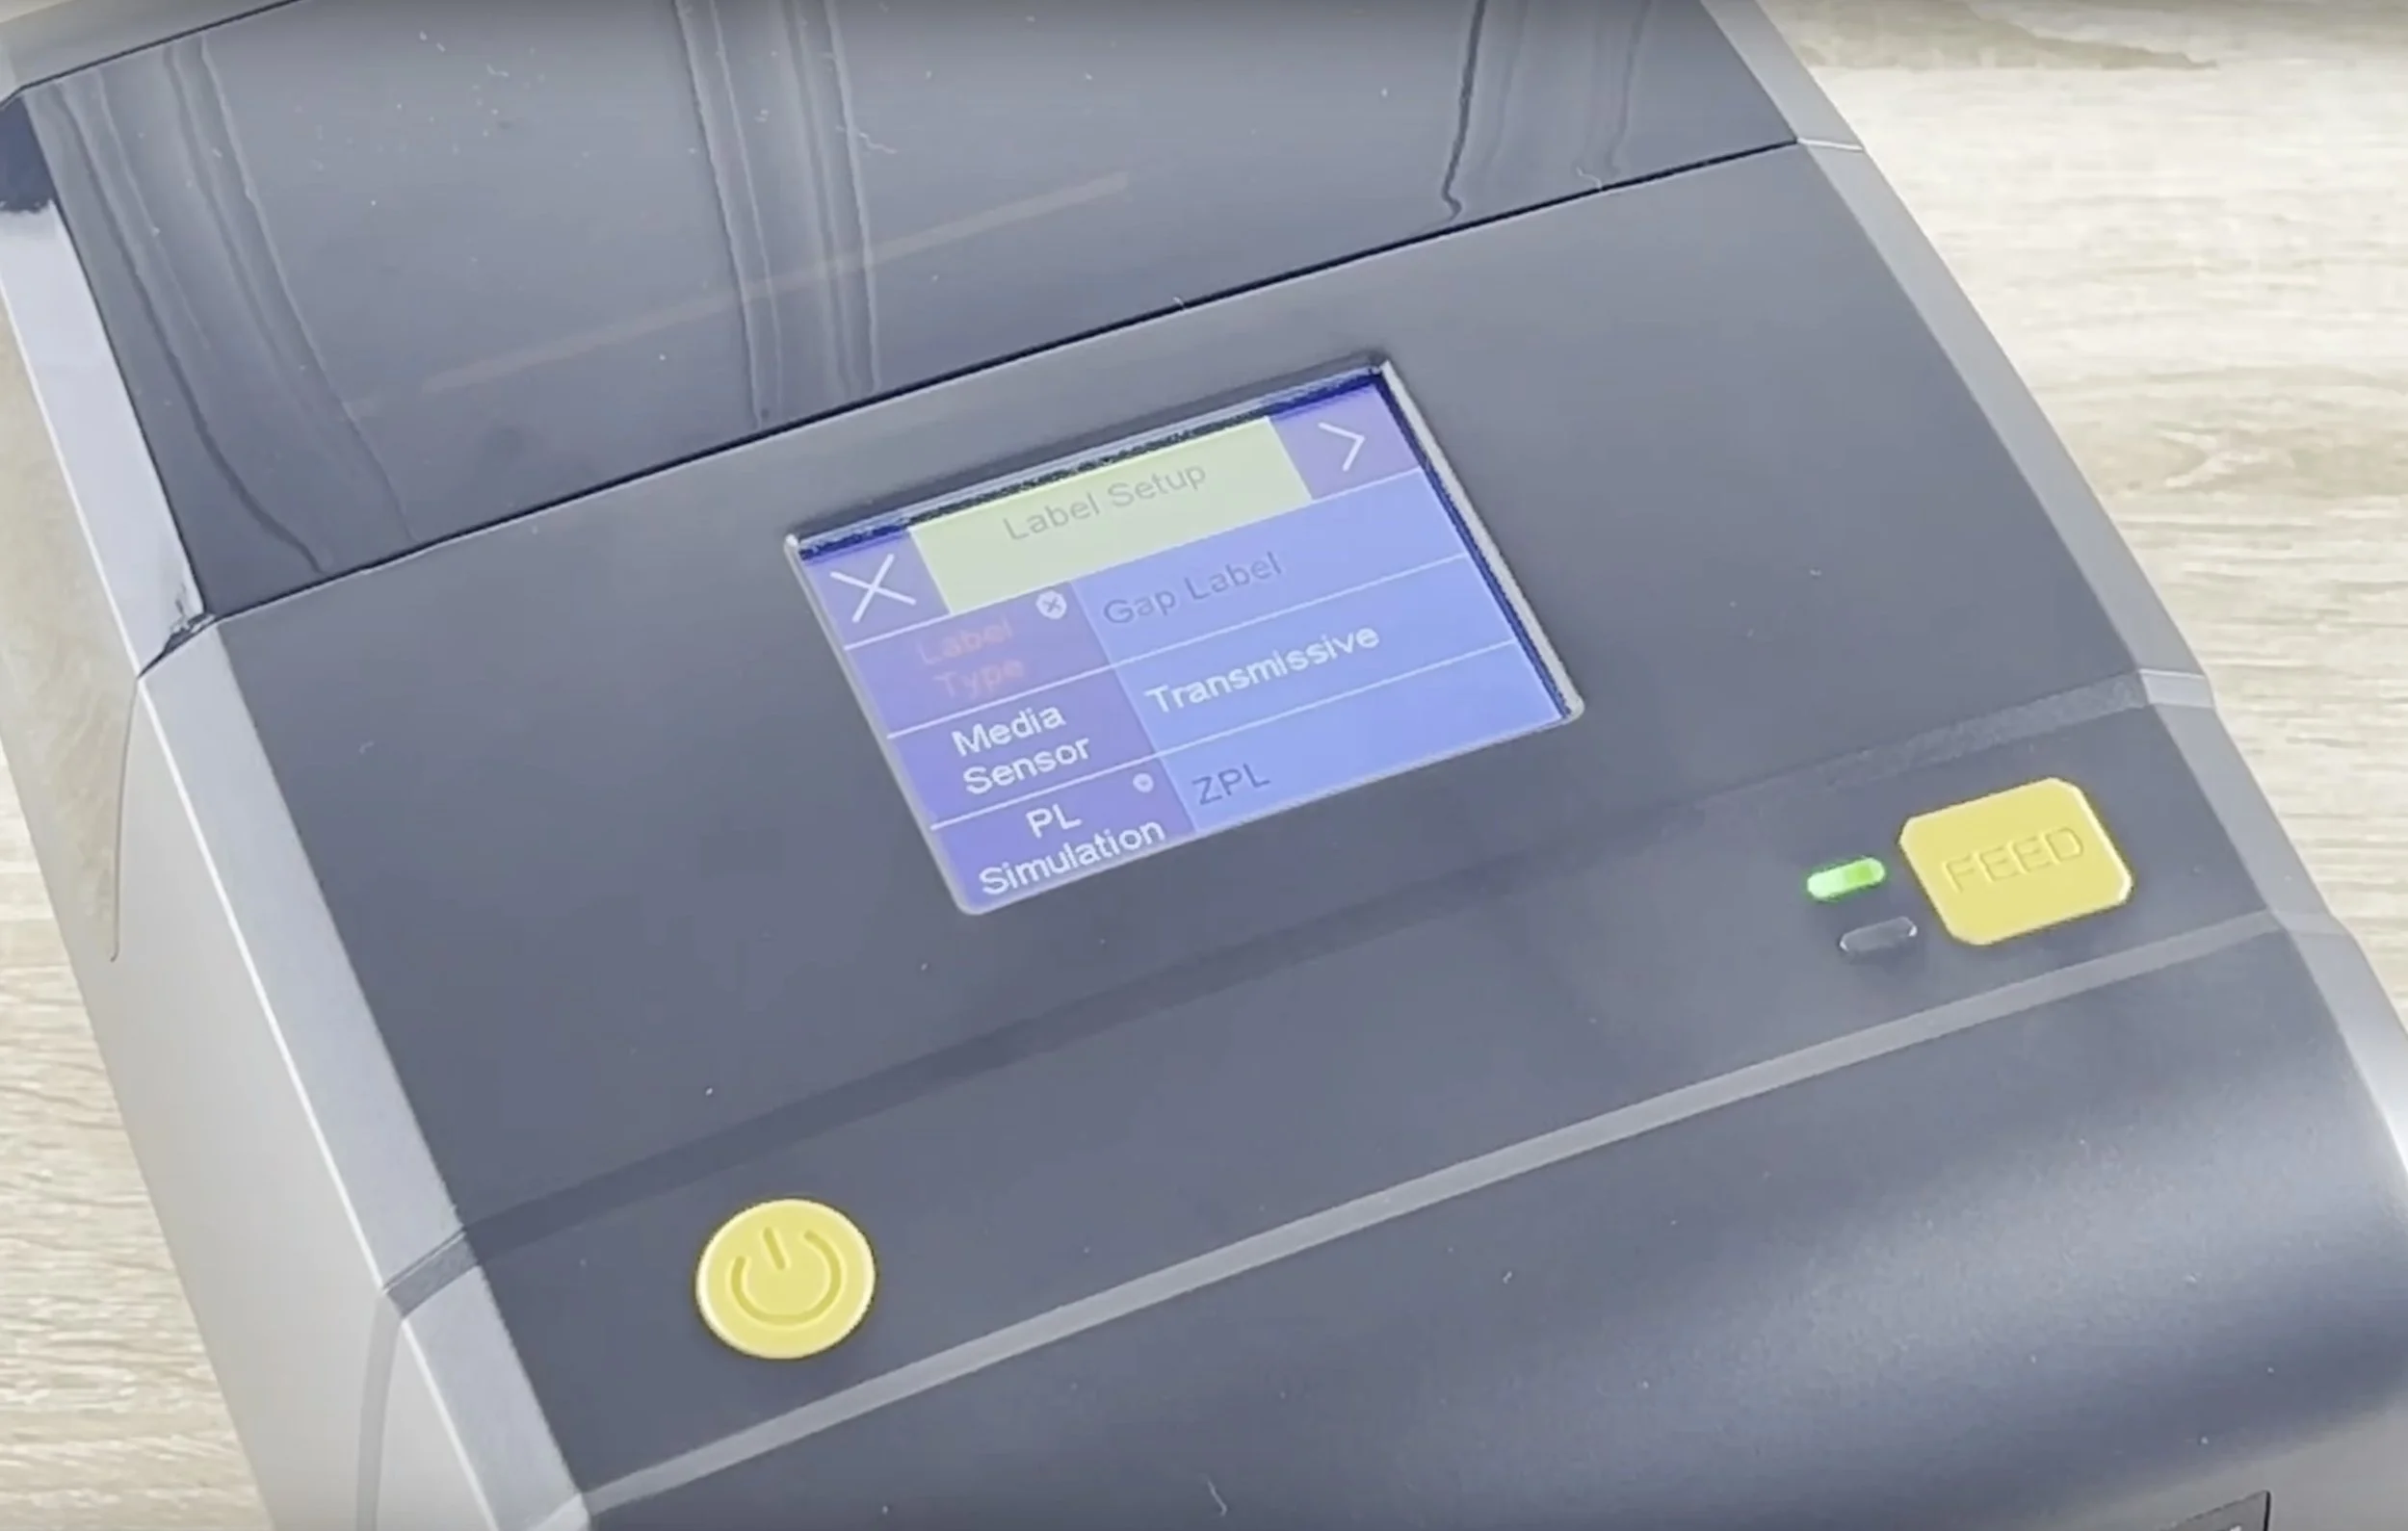
Label Setup:
Select Settings -> Label Setup
Ensure that the label type is set to "GAP LABEL"
Run the Label Calibration.
NOTE: It is recommended that you re-run the Label Calibration anytime you change a roll of tags.